I use pro audio power amps in my home theater. They provide tons of power for little money. There is one major downside though. Most models feature noisy fans, and for a good reason – pro audio power amps are often run at their limits, and many manufacturers prefer to err on the side of caution. For home use though, you can usually get away with replacing the built-in fans with quieter ones as long as the amp isn’t housed inside closed spaces with poor or no ventilation.
Quiet fans move less air, but movies rarely demand the level of cooling required in playing very loud, very compressed music for hours at a time, which is exactly the thing that taxes power amps the most.
I have done three power amp fan mods so far, and each one was different. Let’s start with the easiest one first:
The Behringer iNuke NU6000DSP, a class D amp with built-in DSP. It can do about 2 x 2,000W into 4 ohm short-term, an inexpensive amp well suited for subwoofer duty.
 iNuke nu6000DSP, a class D amp with built-in DSP. It can do about 2 x 2,000W short term into 4 ohm.
The NU6000DSP uses dual 80 mm 12V fans. For this one, I used USB powered 80 mm fans and mounted the fans from the outside. Internal mounting meant drilling holes in the case, which I preferred not to. The USB connector is plugged into the AVR, and the fans start spinning when the AVR is turned on.
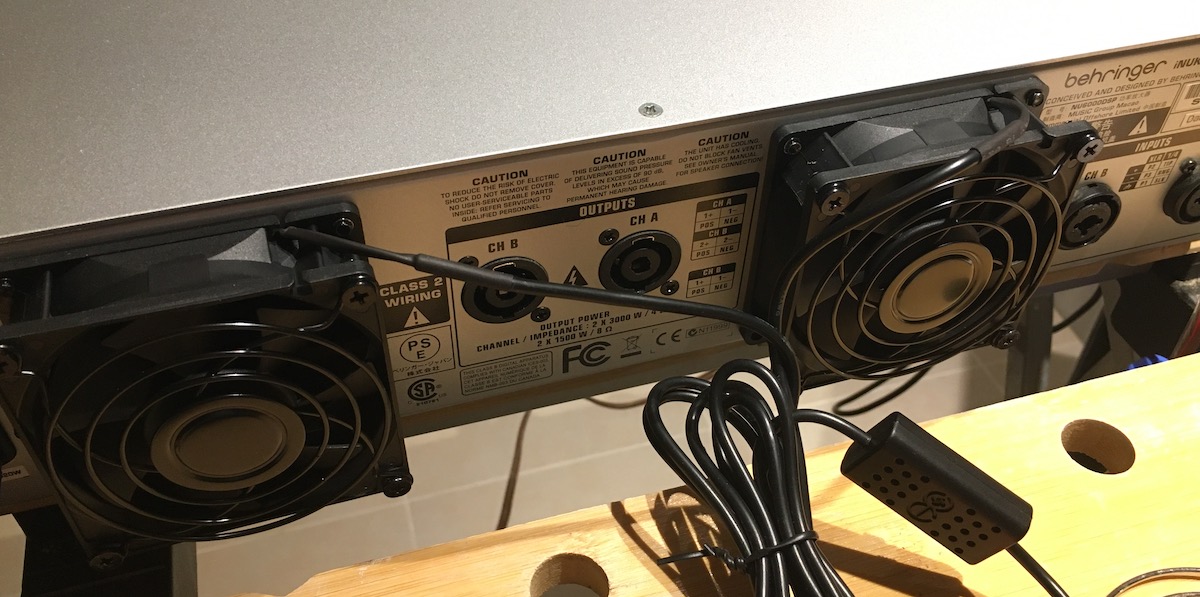 iNuke nu6000DSP USB fan replacement.
Difficulty: Easy
Up next, the Behringer iNuke NU3000DSP, smaller brother of iNuke NU6000DSP, is again a class D amp with built-in DSP. It can do about 2 x 500W into 4 ohm. When bridged, it can produce as much as 2,000W short-term into 4 ohm.
The NU3000DSP looks exactly like the NU6000DSP, but is shorter in depth. It uses an 80 mm 12V fan covered by a black cardboard shroud, which is lightly glued to the fan. The shroud appears to be designed to concentrate air flow to four transistors with small yellow heat-sinks. Once the shroud is removed, replacing the existing fan with a quieter version is easy. The fan connector needs to be fixed in place with a dab of hot glue though.
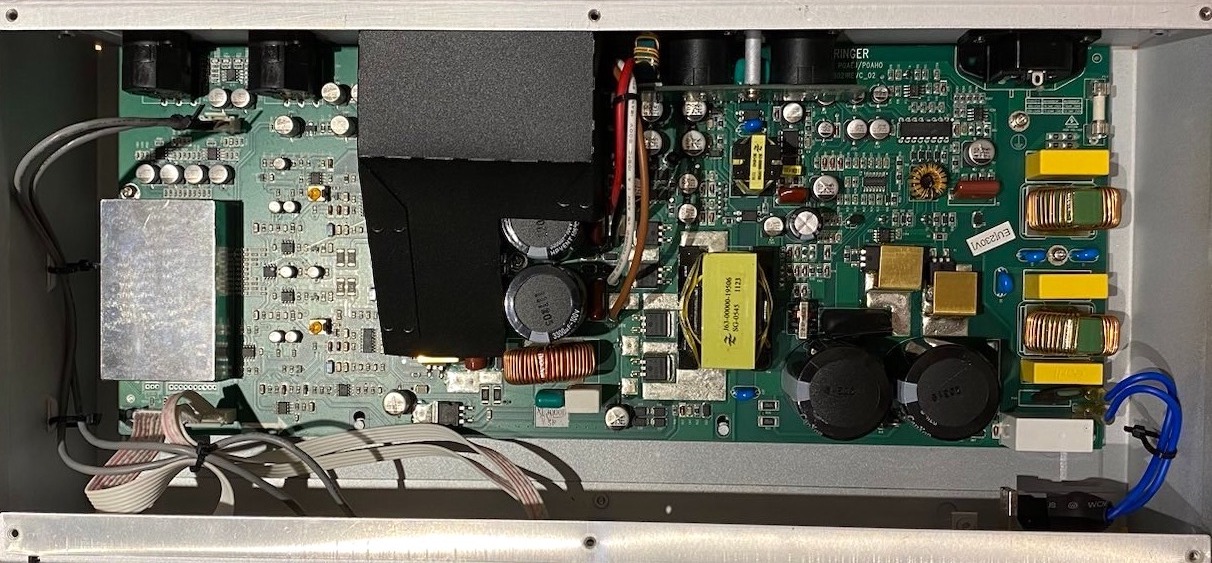 iNuke NU3000DSP's fan covered by a black cardboard shroud.
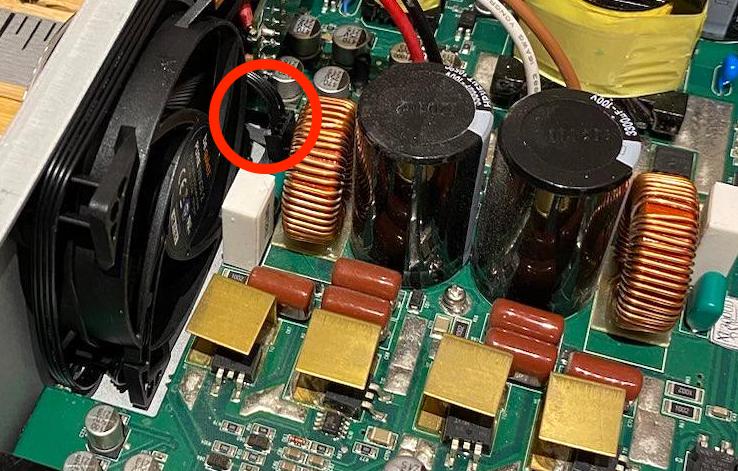 iNuke NU3000DSP quiet fan replacement.
Difficulty: Easy
The fan mod that required the most effort is a Behringer KM750, a traditional class AB amp. I use this one for my center channel speaker. It can do about 2 x 180W RMS into 4 ohm.
 Behringer KM750, a traditional class AB power amp that can do 2 x 180W RMS into 4 ohm.
The KM750 has a 90 mm 24V fan mounted on an internal heat sink. As the heat sink is wide enough, I decided to use a 120 mm fan, which can spin slower (and quieter), but still move quite a bit of air. So, how do you mount a 120 mm fan to a heat sink with holes drilled for a 90 mm fan?
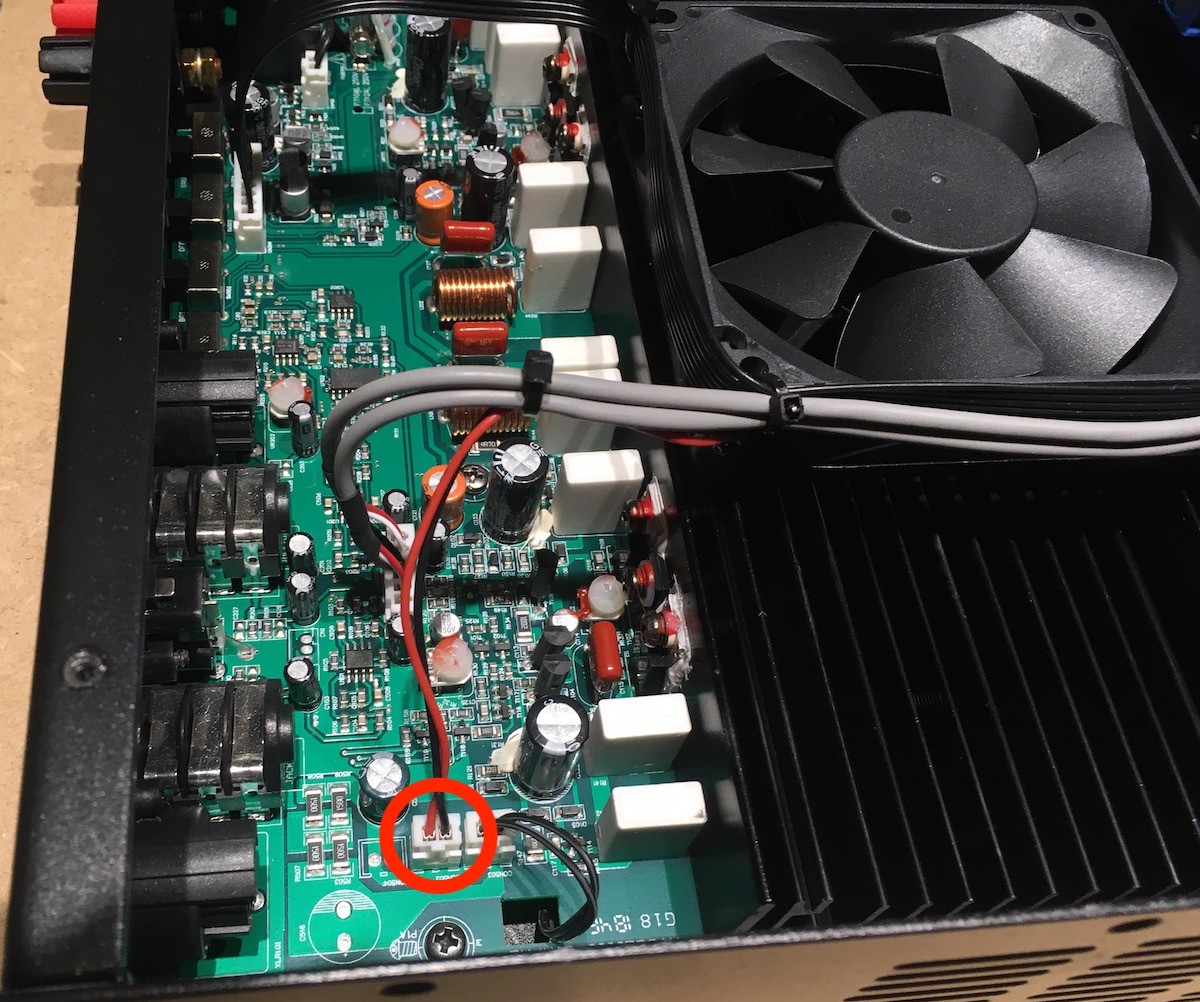 Behringer KM750 uses a 90 mm 24V fan with a 2-pin connector.
I had four options:
- Mount the fan by using just one hole and hope the fan wouldn’t move over time.
- Drill and tap new holes in the heat sink.
- Buy an adapter.
- 3D print an adapter.
I happen to have a 3D printer, and decided to print a 3D model I found online. I had to print it slightly thinner though. Otherwise it wouldn’t fit under the top cover of the amp.
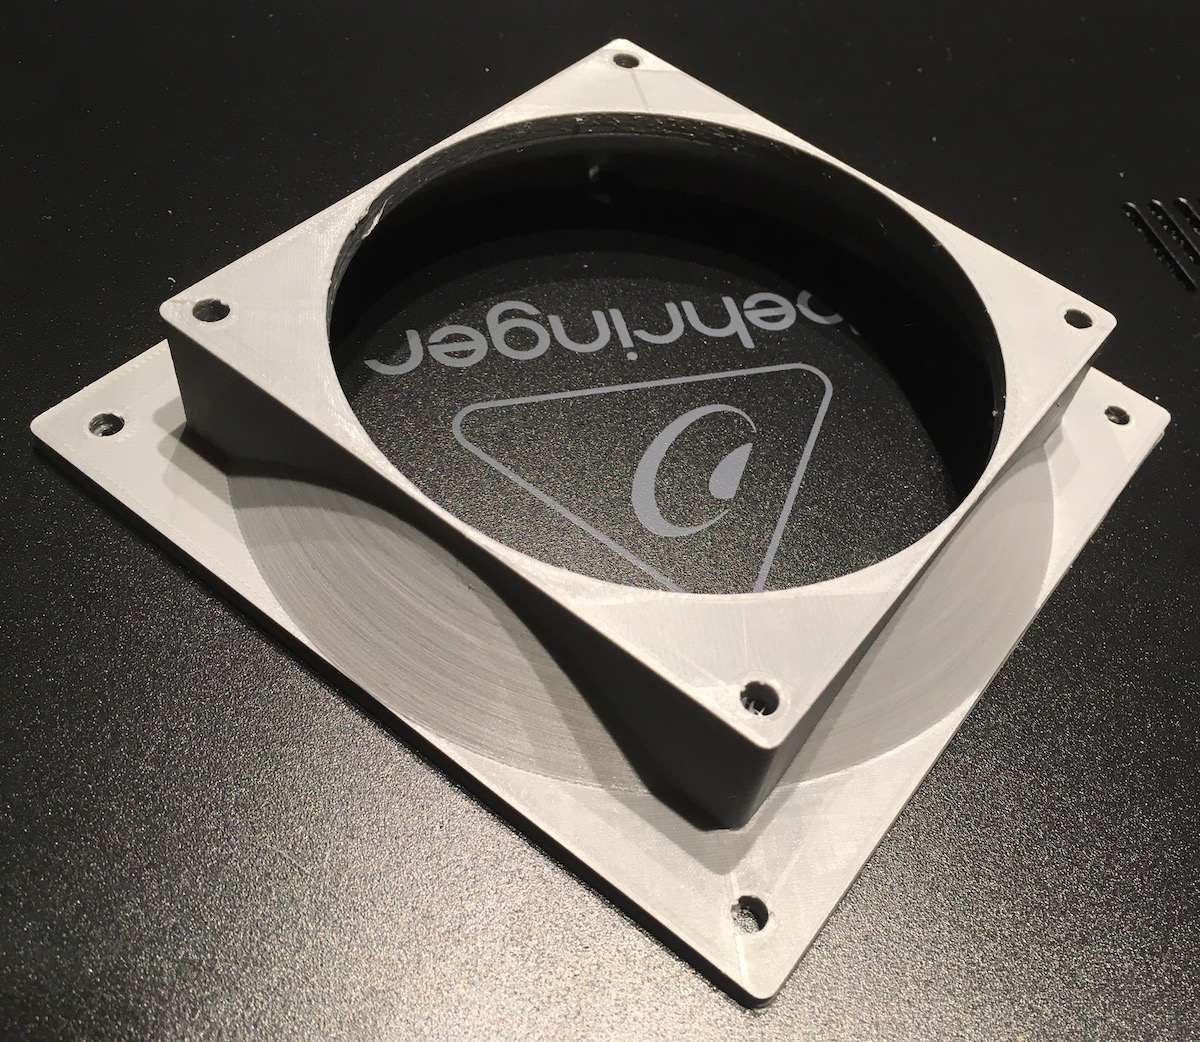 3D printed 120 mm to 90 mm fan adapter.
Since most quiet fans are 12V, an inexpensive buck converter is necessary to lower the 24V provided by the amp to 12V or less. In the end, the 120 mm fan wasn’t quiet enough at 12V, so I lowered the voltage to less than 10V until the fan noise was acceptable. Even in cases when you don’t need a buck converter, they can come handy to lower fan noise to exactly the level you want.
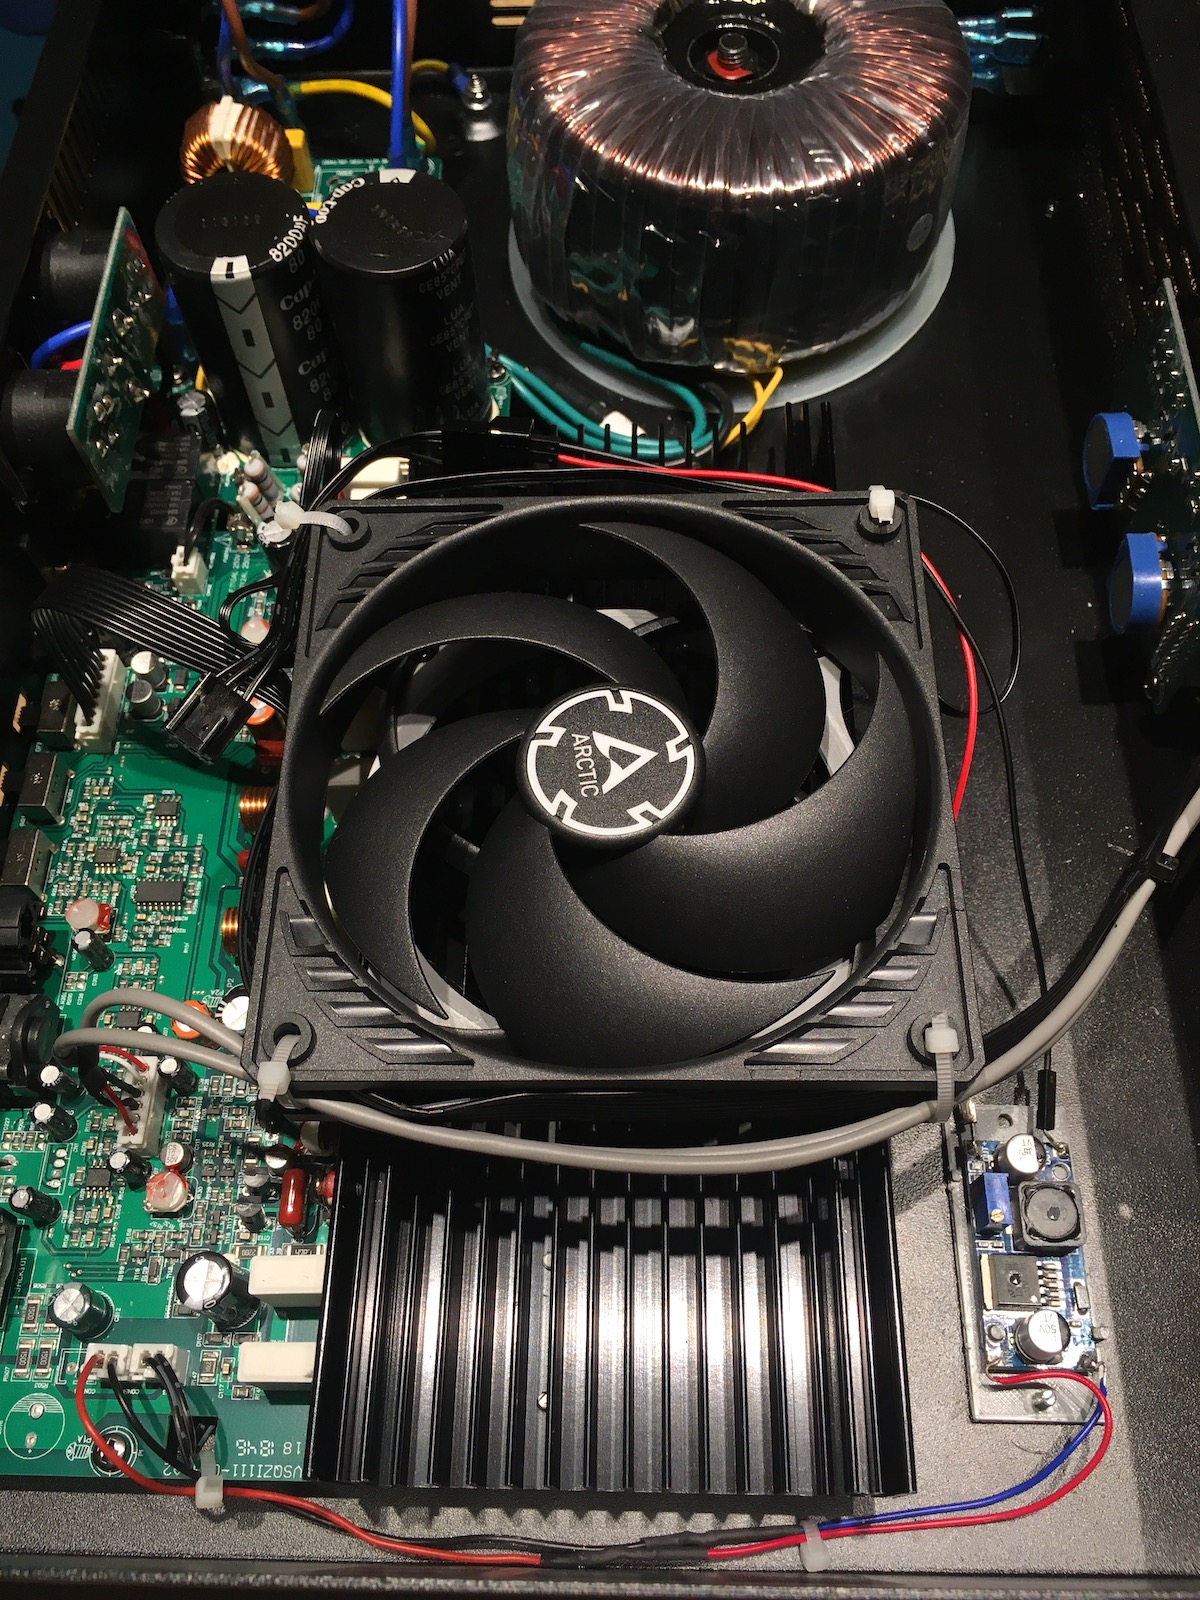 120 mm fan installed. A buck converter lowers the voltage to less than 12V.
In the picture above, the buck converter can be seen on the bottom-right corner mounted on a suitable spot. I didn’t feel like drilling holes in the bottom of the case. There was already a screw hole for one of the feet, so I used that screw, a 3D-printed piece to mount the buck converter and some hot glue to hold everything in place.
Difficulty: Medium
…and that’s a wrap. Three different amps, three different ways to do fan mods.
Disclaimer: Working on electronics connected to AC power can kill you. If you don’t know what you are doing, please don’t.
Related: