Subwoofers are probably the most misunderstood and difficult-to-integrate components of a music or home theater system. However, when integrated properly, they have the potential to elevate your speakers to a whole new level. Over the years, I’ve bought and built quite a few subwoofers, and I’d like to share what I’ve learned about them with you.
The first few sections of this guide cover the basics, such as how to choose the right subwoofer(s) and how to make them sound good (they aren’t exactly plug-and-play). Later sections discuss building your own subwoofers for a fraction of the cost of commercial units. Finally, for endgame deep bass reproduction, you might want to read the section on the double bass array (DBA).
Table of Contents
First things first, what’s a subwoofer?
The image of a large black box housing a big speaker driver that pumps out deep bass is probably the first thing that comes to mind. A subwoofer’s purpose is to complement the main speakers, many of which struggle to reproduce the lower octaves of music and sound effects at satisfactory levels.
Types of subwoofers
For home use, the most popular types are sealed and ported (also known as vented). Sealed subwoofers have only the driver that produces bass while ported subs have one or more vents usually in the shape of a circle or rectangle that produce bass in addition to the driver.
Sealed subwoofers are compact. Although large sealed subwoofers exist, a sealed subwoofer can be made only slightly larger than the driver dimensions (imagine a 13-inch cube housing a 12-inch driver).
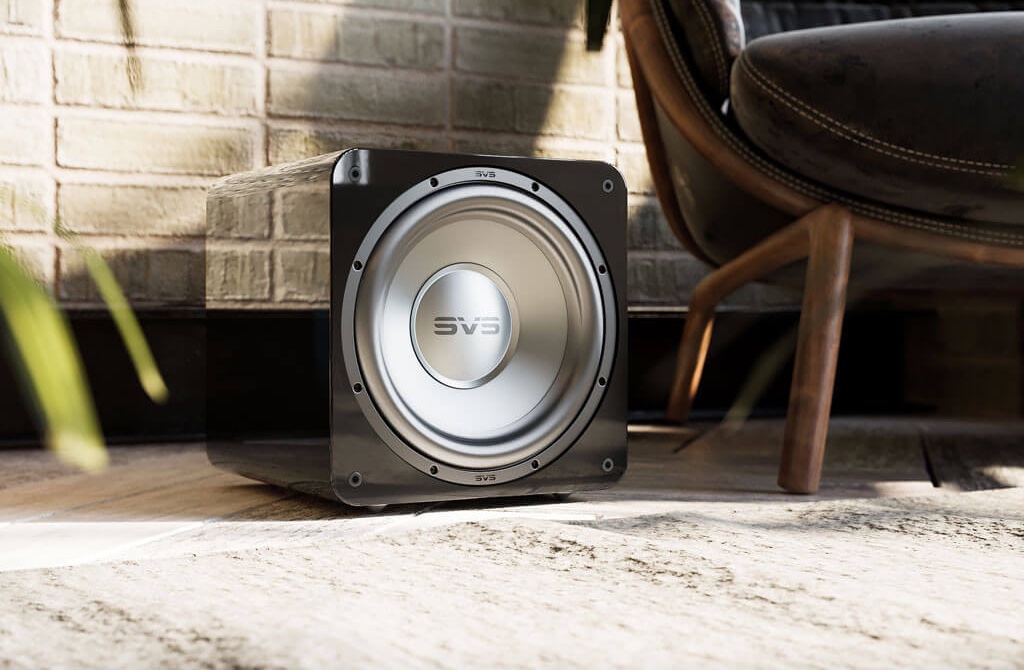 A compact sealed 12" subwoofer. Image © SVS
Ported subwoofers are generally quite a bit larger, but they can produce significantly more output –up to 10 dB– within a certain frequency range compared to sealed subwoofers. However, some may suffer from port noise (also known as chuffing) when pushed to their limits.
 A rather nice looking 15" slot ported subwoofer. Not all ported subwoofers look this good. In fact, featureless black boxes are the norm. Image © Seaton Sound, Inc.
What to look for in a subwoofer?
Box dimensions: It depends on where your priorities lie. If compact size is important to you, then large ported subwoofers are probably out of the question. That doesn’t mean that all ported subwoofers are large – there are relatively compact ported subwoofers, but they have to sacrifice some deep bass output in order to fit in a compact cabinet.
Driver diameter: All other things being equal, as the driver diameter gets larger, the bass output produced by the driver increases. Subwoofer drivers typically come in nominal diameters of 8", 10", 12", 15" and 18" (20, 25, 30, 38, 46 cm respectively). The most popular diameters for home use are 10" and 12". A subwoofer can have more than one driver, but most have one.
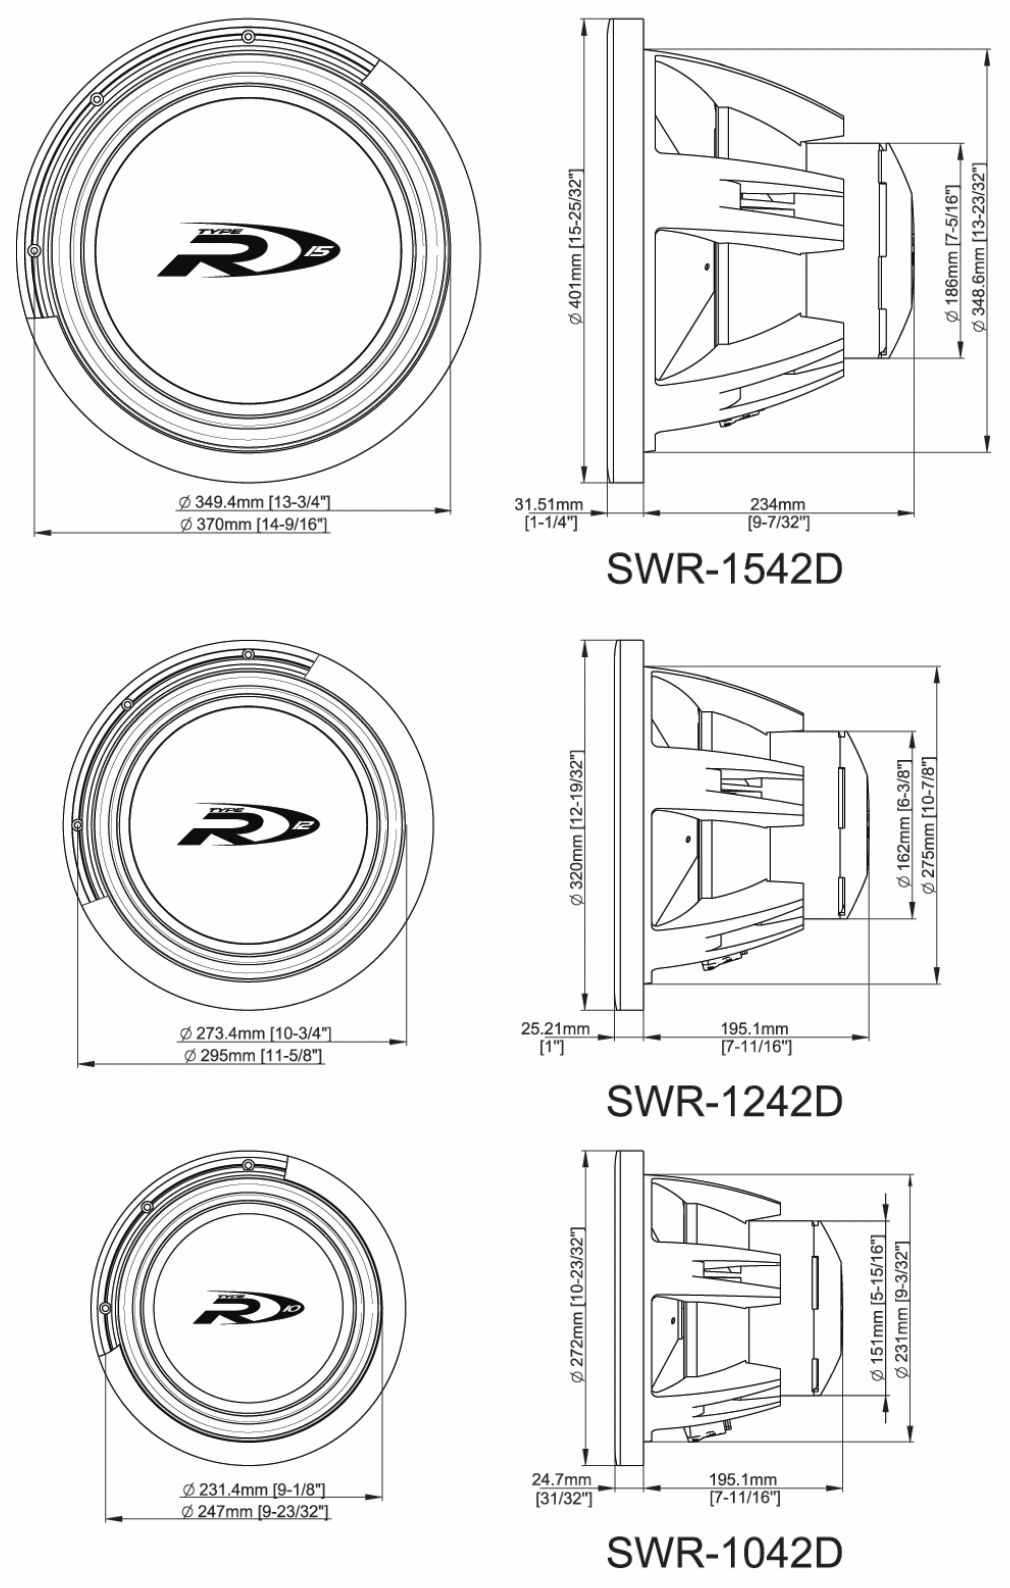 15", 12" and 10" drivers from a car subwoofer driver line. Some home subwoofer manufacturers use car drivers, and they are also a popular choice for DIY subwoofer builders. More on that later.
A good rule of thumb is that as you increase the size of the driver, you get about twice as much bass output. For example, a 12" driver has roughly double the output of a 10" driver, assuming both drivers have similar technical parameters other than surface area, and the same amount of amplifier power is used. However, there are exceptions. Some high-performance 10" drivers can outperform an average 12" driver, but these can be expensive and often require substantial amplifier power to reach their full potential.
Amplifier power: After driver size, the next important factor to consider is the available amplifier power. Most commercial home subwoofers come with built-in amplifiers. The amplifier needs to provide enough power for the driver to achieve satisfactory output levels. It’s wise to disregard any peak power ratings, as they are often exaggerated and difficult to compare across different brands. What matters is RMS power (also known as continuous power), preferably provided with a distortion rating (like 1% THD) to allow for accurate comparisons.
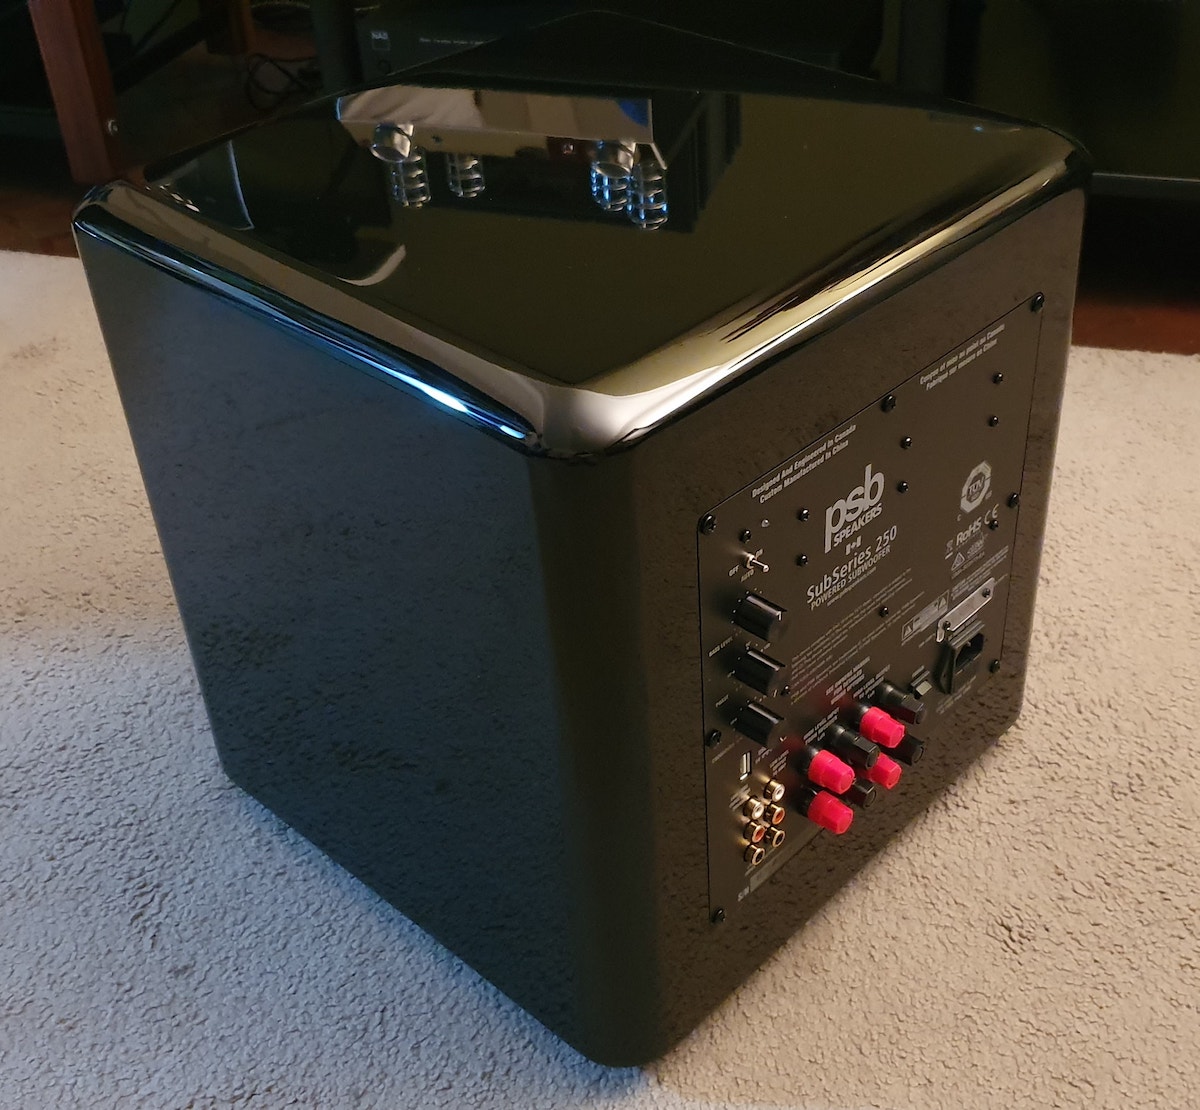 A home subwoofer usually has a built-in amplifier to supply power to the driver.
There’s no need to sweat over small differences in amplifier power. For example a 25% difference may look big on paper when comparing a 400W RMS amplifier to a 500W RMS amplifier, but it only amounts to 1 db more output all other things being equal, which is so small that it’s hard to tell the difference in practice. For a meaningful output difference, an amplifier should be able to provide twice the power which is equivalent to 3 db of additional output.
Frequency response: Finally, take a look at the +/- 3db frequency response specification of the subwoofer. A subwoofer that can authoritatively reach down to 25 Hz or lower is ideal. However, frequency response alone isn’t very telling. Nowadays, many sealed subwoofers utilize digital signal processing (DSP) or other means to enhance lower frequency output at lower volumes. If the driver lacks sufficient surface area and the amplifier power is limited, a subwoofer’s ability to reach low frequencies doesn’t matter much, as these frequencies won’t be loud enough to hear or feel at higher volumes.
How many subwoofers?
How about zero?
It might seem odd to suggest going without a subwoofer in a guide about home subwoofers, but if you have terrible room acoustics that are difficult to manage, it might actually be a good idea to go without one. Contrary to common belief, boomy bass isn’t always caused by cheap subwoofers. More often than not, the main culprit is poor room acoustics – walls made of brick or concrete and minimal furnishings can create severe resonance issues.
If you clearly hear an echo when you clap your hands inside a room, you will likely experience boomy bass with a subwoofer in that space regardless of the subwoofer’s quality. While there are ways to address some acoustical issues, not all solutions are practical. However, don’t get discouraged. Just be aware that in some cases, it might be better to have no subwoofer at all than to have one.
One subwoofer placed right
If you are going to have only one subwoofer, like most people, achieving the most even response from your subwoofer is all about placement. There are really only two optimal locations for a single subwoofer to accomplish this (more on this later).
Going dual: Buy two get two free
If you have the funds and space for two subwoofers, having dual subwoofers offers several advantages over a single subwoofer, assuming their placement in the room is correct:
- Quadruple the output over a single subwoofer if they are placed relatively close to each other. You literally get two additional subwoofers worth of output for free, thanks to a physical phenomenon known as mutual coupling of sound waves.
- Consistent bass output across a horizontal plane. In other words, no matter where you sit on the sofa, the bass will sound about the same.
- Instead of one large subwoofer that is difficult to place or hide, two smaller subwoofers can be used.
- Two subwoofers can function optimally in many more locations.
More than two subwoofers?
While there is no upper limit to the number of subwoofers you can use, for most people, having two subwoofers hits the sweet spot. If you simply need more bass output, you can colocate subwoofers (a fancy term for placing multiple subwoofers in close proximity), and they will act as one large subwoofer.
You can also have more than two subwoofers distributed across the room, but they require careful measurements to function properly. If you are curious about non-colocated subwoofer setups with more than two subwoofers, head over to the double bass array section.
How to setup subwoofer(s)
It’s extremely unlikely that randomly placing a subwoofer will result in good sound. Subwoofers require some effort to sound their best.
Where to place your subwoofer(s)
One subwoofer
Try to avoid corner placement as it will produce uneven bass across the room. If possible, place your subwoofer along the front wall, preferably right in the center. If the center of the front wall isn’t available, you can try placing your subwoofer along the center of the rear wall.
 Center front or rear wall placement is ideal for a single subwoofer.
Two subwoofers
Having two subwoofers offers a lot of flexibility with placement. They can be placed in each corner of your front wall. You can also move them closer toward the center of the wall as long as each subwoofer is roughly an equal distance from the side walls. Placing the subwoofers at locations of 1/4 the width of the front wall is recommended to achieve the smoothest response. For example, if your front wall is 4 meters wide, try placing your subwoofers about 1 meter away from the side walls.
 Dual subwoofers can be placed symmetrically along the front wall for a smooth bass response.
Where to sit
If possible, avoid sitting close to walls (especially the rear wall), where bass can become overwhelmingly intense in a negative way. Sitting in the middle of the room isn’t a good idea either, as this is where bass energy is typically at its weakest.
The Crossover Frequency
The crossover frequency determines at which point your main speakers start to hand off bass reproduction to your subwoofer(s). An 80 Hz crossover frequency is usually recommended, but if your speakers are particularly lacking in bass, you might want to increase this to 100 or 120 Hz for a smoother transition. Virtually all AV receivers (AVRs) have built-in crossover capabilities. If you are using an AVR to set the crossover, it’s best to disable the crossover setting on your subwoofer(s) or set it to the maximum setting possible.
Room Correction
Once the subwoofer placement is optimal and you are ideally not sitting too close to the rear wall, there is one more step left to enjoy smooth bass reproduction in your room: applying room correction. This is necessary to address room resonances that can’t be solely fixed by subwoofer placement.
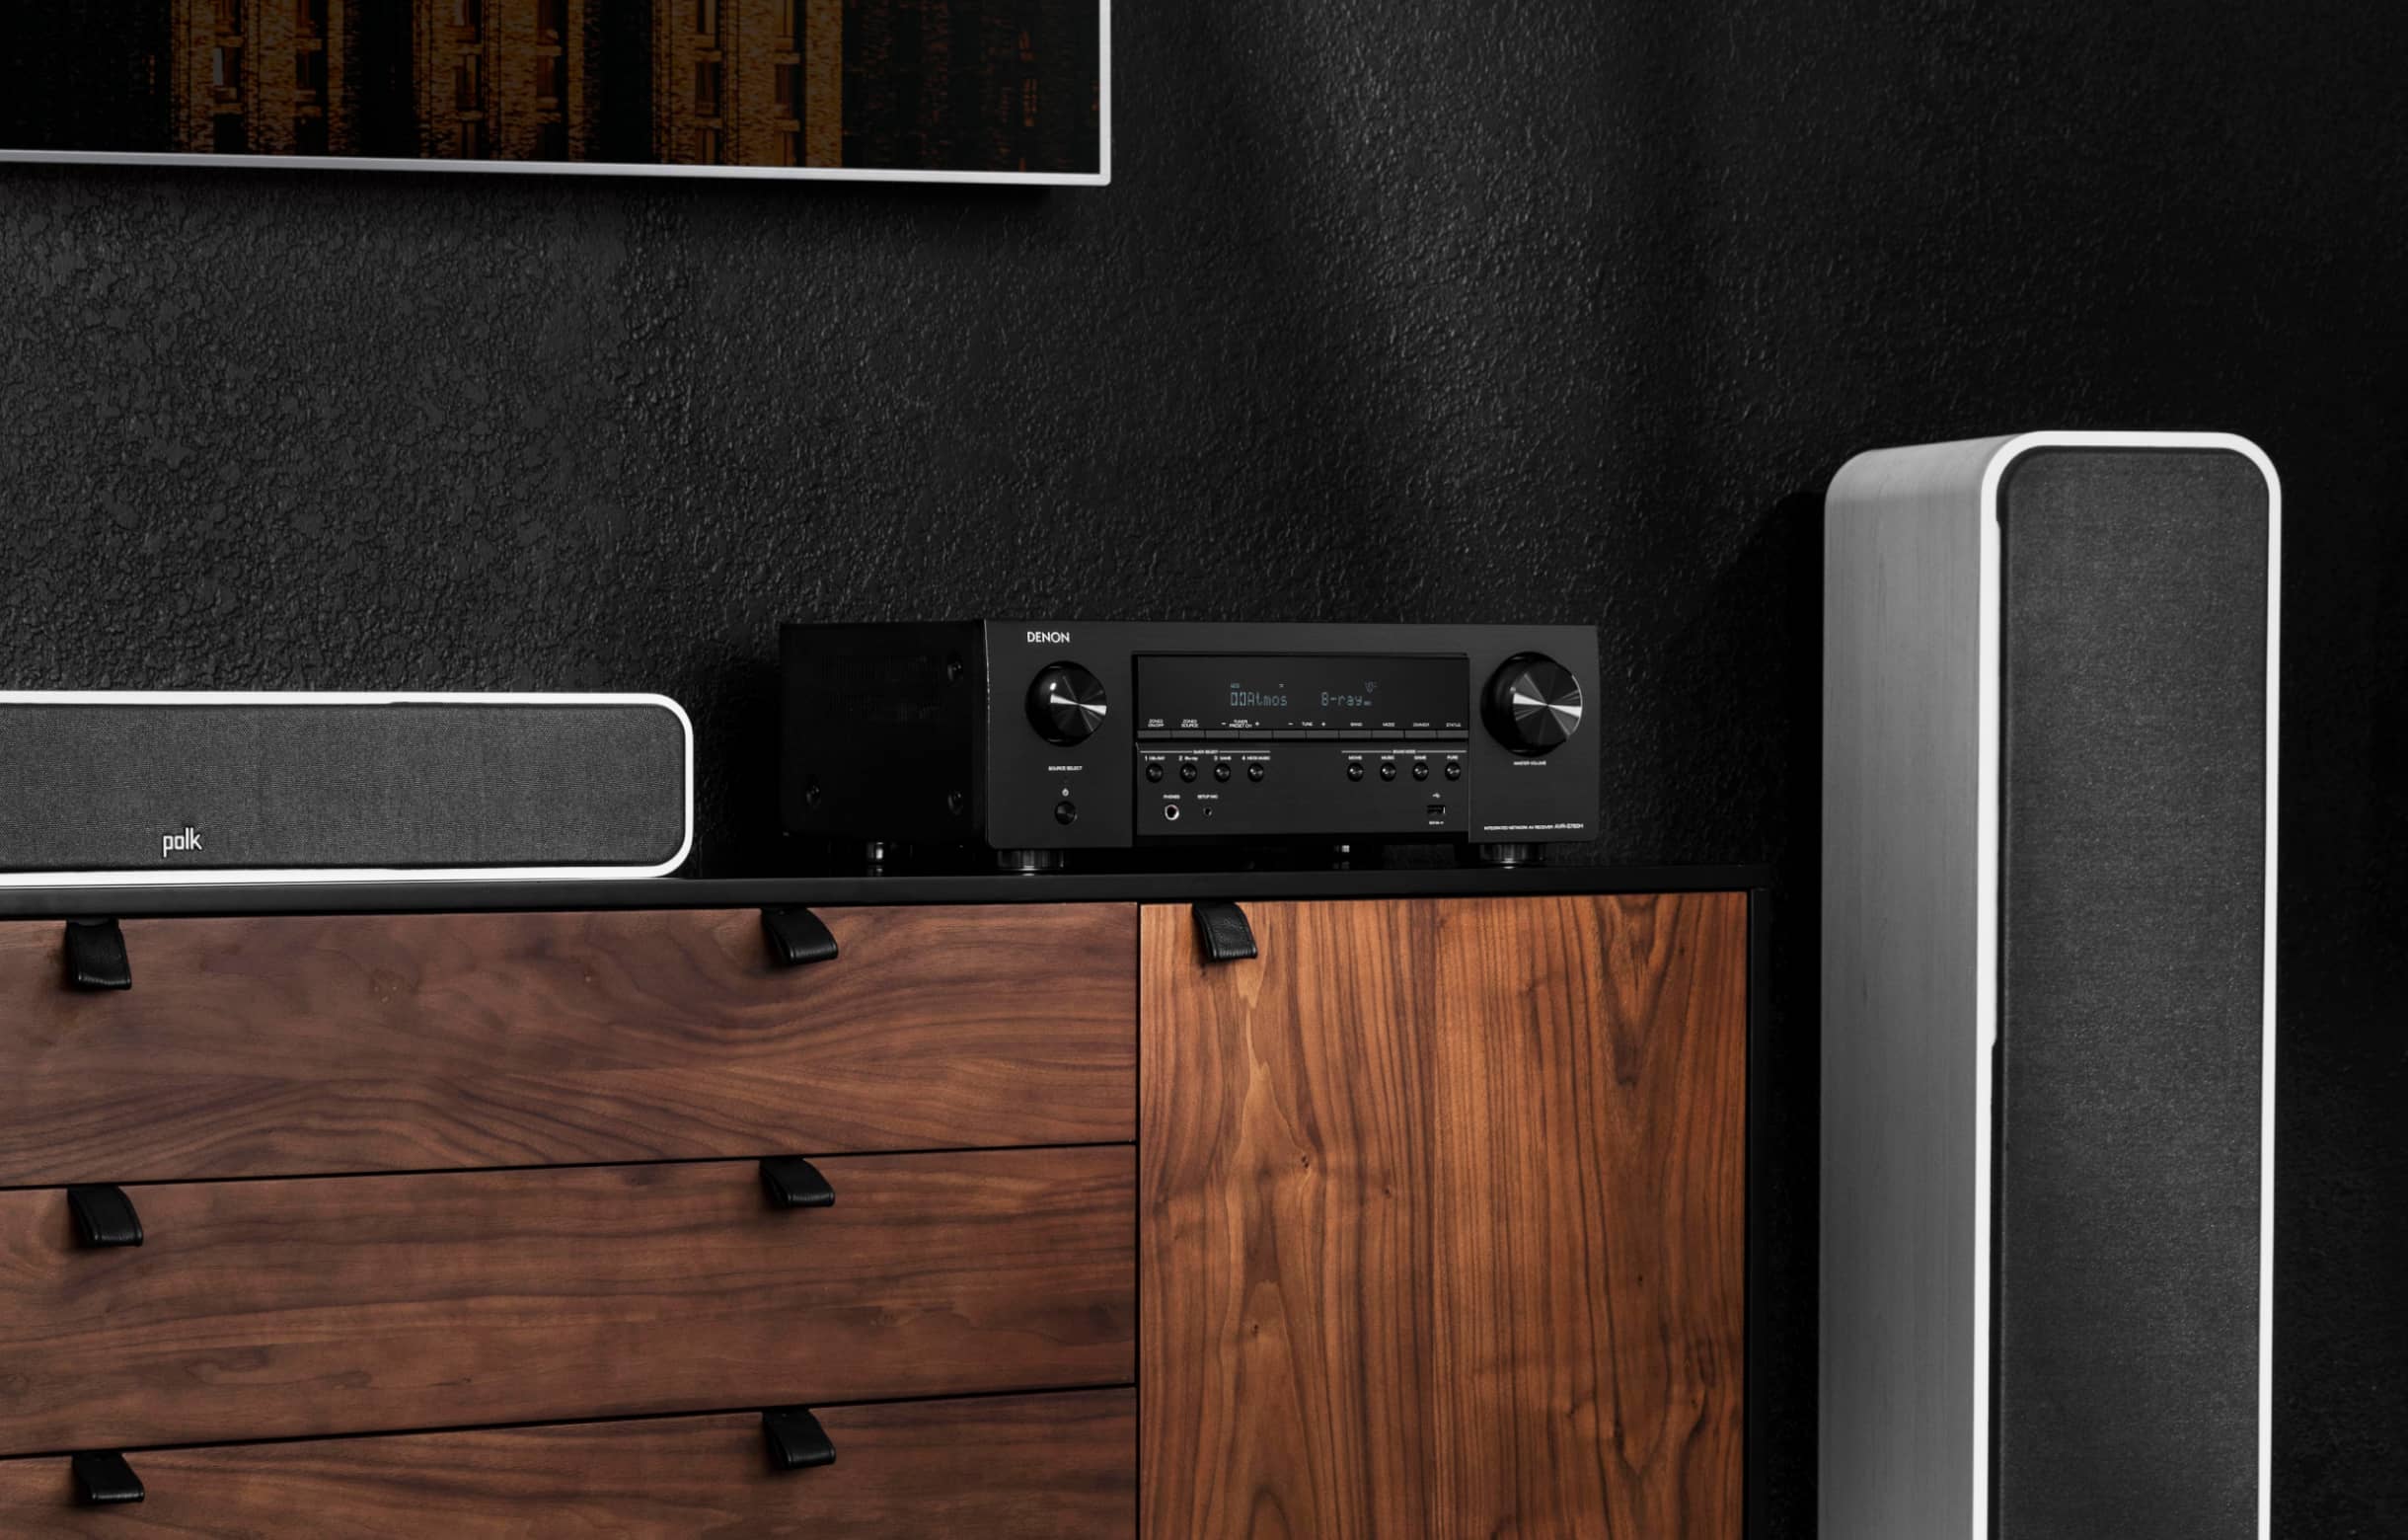 Many modern AV receivers have automatic room correction capabilities. Image © Sound United, LLC.
If you own a modern AV receiver, it’s a good idea to try out your AVR’s automatic room correction capabilities. Many AVRs produced in the last decade support some form of automatic room correction, and they generally work in a similar way, although the results may vary depending on the quality of the room correction algorithm used (some are very basic) and the severity of the acoustic issues.
You should place the calibration microphone that comes with the AVR in one or more listening positions, preferably attached to a tripod, and allow the AVR to take measurements by playing test tones for each speaker, including your subwoofer. After the measurements are completed, corrections are applied at certain frequencies to reduce the audibility of resonances in your listening position. Although it’s called room correction, the effect of the corrections is often limited to the small listening area where the calibration microphone is placed.
For advanced users who have a good measurement microphone (you can probably get away with the AVR’s microphone although some caveats apply), there is a powerful free software application called REW (Room EQ Wizard) that can be used to measure your subwoofer’s response. Then, you can apply corrections using the parametric EQ capabilities available on your computer or an external device called a DSP. More on that in the DIY section.
DIY Subwoofers
Granted, DIY (Do-It-Yourself) isn’t for everyone, but for those interested in building their own subwoofers and making their own acoustic measurements, the potential rewards are significant. You can achieve high-quality bass reproduction for a fraction of the cost of an equivalent commercial subwoofer setup and professional calibration. Not to mention the personal satisfaction of building something yourself that will be put to good use for years to come.
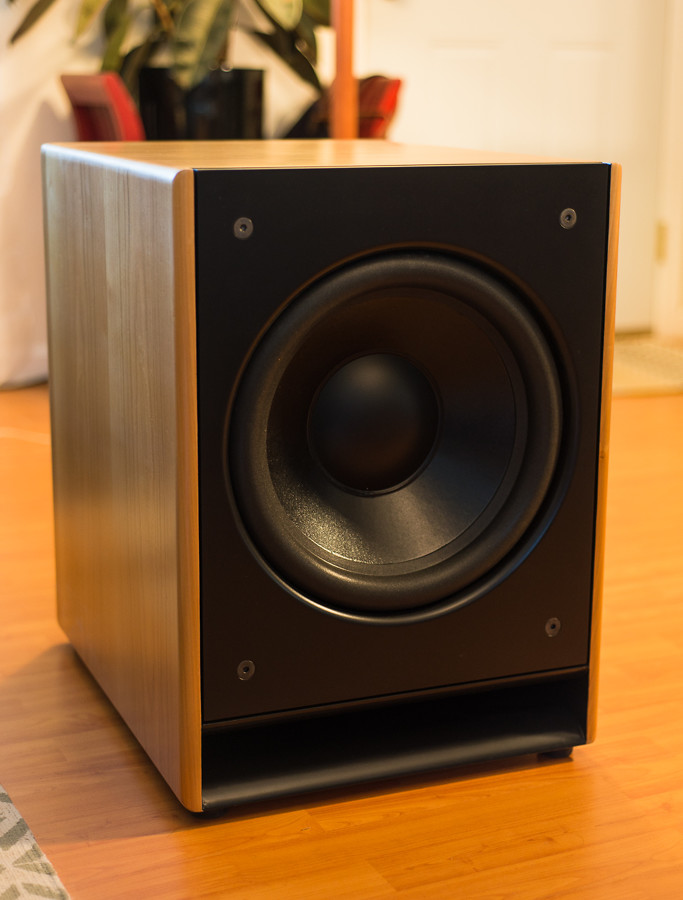
Building a subwoofer isn’t really hard. It can be done with little to no woodworking skills and minimal tools. Having had no prior experience, I built my first subwoofer using nothing more than a power drill, a jigsaw, and a few wood clamps. Since then, I’ve built many subwoofers over the years, and although the later ones look better, they’ve all functioned well.
 Building a subwoofer can be done with little to no woodworking skills.
A subwoofer consists of three components: one or more subwoofer drivers, an amplifier, and a box. Sourcing the driver(s) and amplifier(s) is relatively easy. The only remaining task is to build a box from MDF (Medium Density Fiberboard) or high-quality plywood. If you don’t have the tools to make the cuts, your local home improvement store will likely do the job for you for a small fee. You may also purchase ready-made subwoofer flat-packs online if they are available in your region. Once you have the pieces cut, they can simply be glued together with wood glue and held with a few clamps until the glue dries. More on box construction later.
How to choose a driver
Among DIY subwoofer builders, the driver of choice is often a car subwoofer driver for a number of reasons:
- They are widely available and many are reasonably priced.
- They have the necessary moderate to high excursion capabilities to reproduce special sound effects like explosions at high volumes, a desired feature for home theaters.
- Many are designed to work in relatively compact enclosures, which is always a plus.
- Finally, many of them are tolerant of abuse since car subwoofer manufacturers know it all too well that car subwoofers are pushed beyond their limits quite often.
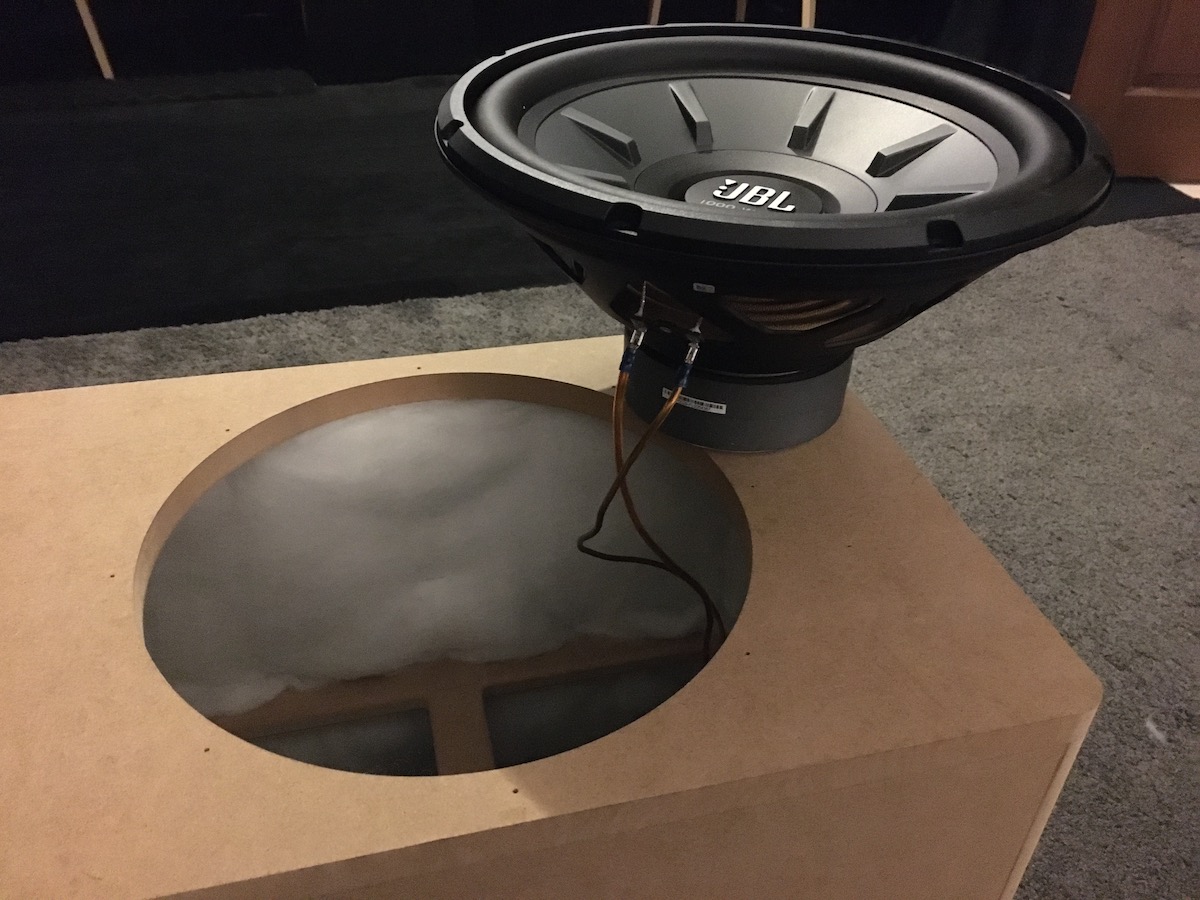
 10" and 8" car subwoofer drivers with substantial motor structures.
Thiele/Small parameters
Most manufacturers provide the Thiele/Small (T/S) parameters for their subwoofers. These parameters can be used to objectively compare drivers and are also essential for determining the appropriate box size. For home theater use, the most important parameters are:
- Maximum linear excursion (Xmax), the maximum distance a subwoofer cone can travel in one way without gross distortion. Xmax is important because as you go down one octave such as from 40 hz to 20 hz, the subwoofer cone needs to travel 4 times the distance to have the same level of output.
- Usable surface area of the driver (Sd), which is the area of the driver excluding parts of the surround and outer frame. The greater the surface area, the easier it is to produce bass.
- Resonant frequency (Fs), which is the natural resonant frequency of the cone. This is the frequency where the driver is most efficient (outside of a box).
You will want Xmax to be as high as possible and Fs to be as low as possible. Sd does not change significantly across drivers of the same diameter, but it is very important because multiplying Xmax by Sd gives you Vd (volume of displacement).
You’ve probably heard the expression “there’s no replacement for displacement” used for car engines. Similarly for subwoofers, the larger the Vd of a driver, the greater the deep bass output will be, all other factors being equal. For example, if the Sd of two drivers are similar (they both have the same diameter), the one with twice the Xmax will produce twice the deep bass output, again assuming all other factors are equal. A large diameter driver with little Xmax and a small diameter driver with plenty of Xmax can produce about the same amount of deep bass, although you will likely need to provide the smaller driver with considerably more power to achieve this.
Other T/S parameters such as QTS and Vas are also important in determining the optimum box size for a subwoofer. If you require a very compact box size without sacrificing too much deep bass output, make sure these two parameters are as low as possible.
Box volume
The easiest subwoofer box to build is a sealed box with no ports. They can be made fairly compact and are tolerant of mistakes. There are free software applications such as WinISD that can help you simulate the behavior of subwoofer enclosures after you enter your driver’s T/S parameters. They also let you see whether you exceed the excursion limits of a driver when you feed too much power to it, but for most drivers, unless the manufacturer recommends otherwise, you can simply use the following approximate sealed box volumes:
- 10" driver: 14 liters (0.5 cubic foot)
- 12" driver: 28 liters (1 cubic foot)
- 15" driver: 56 liters (2 cubic foot)
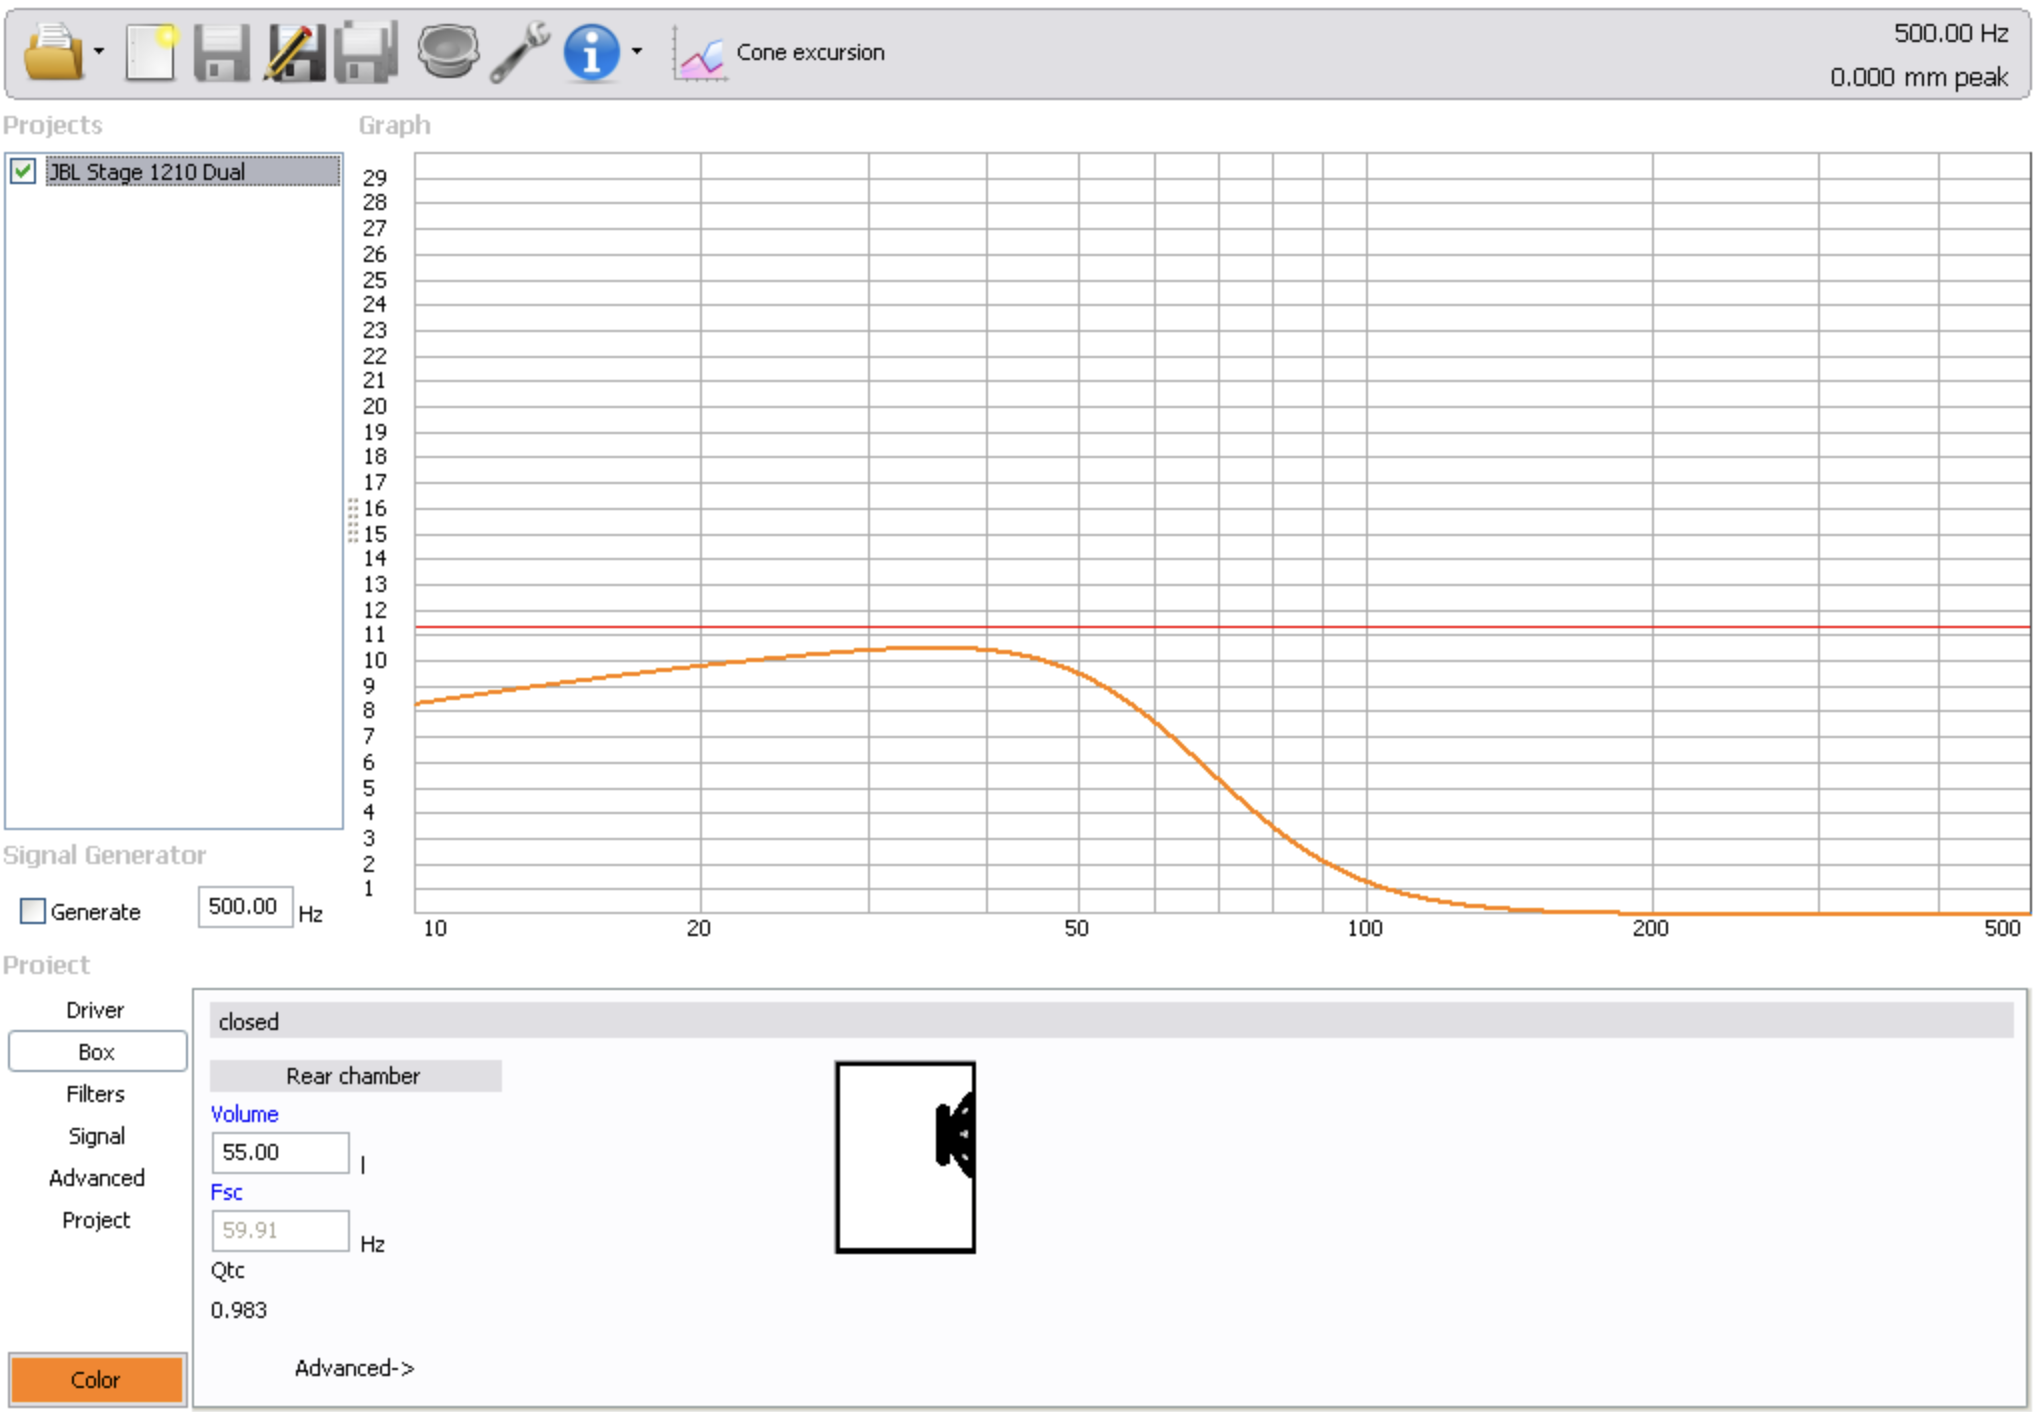 There are software applications that can help you simulate subwoofer behavior.
If you are going to put two drivers in the same box (such as in a dual opposed subwoofer build), you need to double the required volume. Please keep in mind that when calculating the volume of a box, you should use its internal width, height, and depth dimensions.
Amplifier selection
While car subwoofer drivers are popular among DIY subwoofer builders, when it comes to amplifiers, inexpensive multi-kilowatt professional audio (pro audio) amplifiers are clearly the preferred choice. Pro audio amplifiers may not have the best signal-to-noise specifications, but they excel at providing substantial power, which is essential for power-hungry subwoofers. Some of them even have built-in DSP capabilities, which simplify setting crossovers and correcting response anomalies caused by room acoustics.
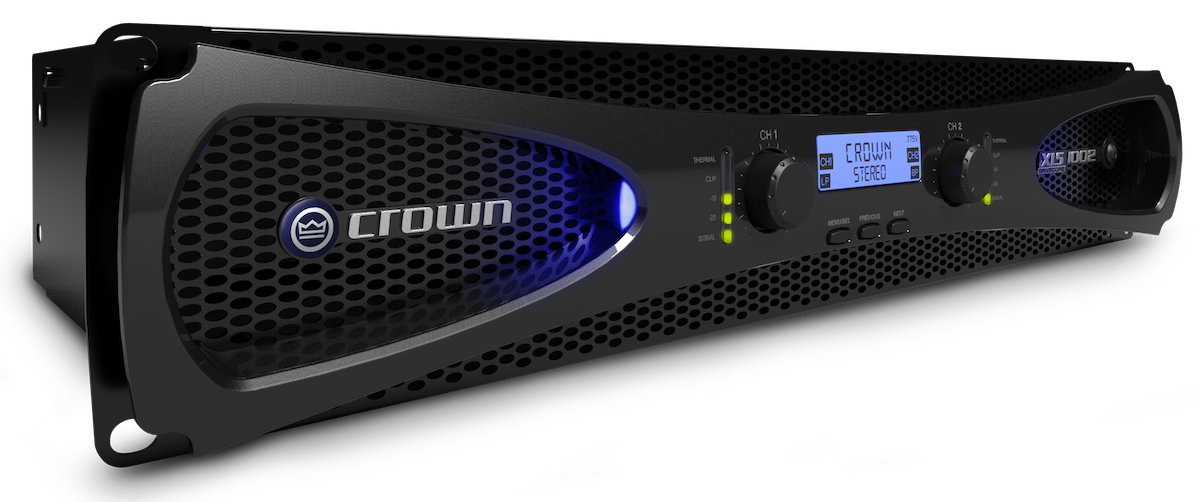 Inexpensive pro audio amplifiers such as this one can provide kilowatts of power. Image © Harman.
There is one major downside to using pro audio amplifiers – virtually all of them have built-in fans, and some of these fans can get quite noisy. It’s challenging to keep an amplifier that provides kilowatts of power cool without a fan. Fortunately, there are models with relatively quiet fans that only start spinning when the amplifier is driven hard. For those amplifiers with loud fans, putting them in another room or replacing the existing fans with quieter ones are options to consider, but the latter would likely void your warranty.
Another potential downside is that unlike commercial subwoofers with built-in plate amplifiers, pro audio amplifiers are often stand-alone units. While plate amplifiers do exist for DIY subwoofers, they aren’t very cost-effective. On the upside, stand-alone amplifiers are potentially more reliable because they offer better cooling.
Building a box
Building a basic sealed subwoofer box isn’t difficult. It requires six sides cut from 18 mm (~3/4") MDF or high-quality plywood (preferably made from void-free hardwoods such as Baltic birch), a cutout for the driver, one or two braces to strengthen the box, some wood glue, and a few clamps to hold everything together until the glue dries. Using silicone caulk to seal all internal joints will ensure the box is airtight.
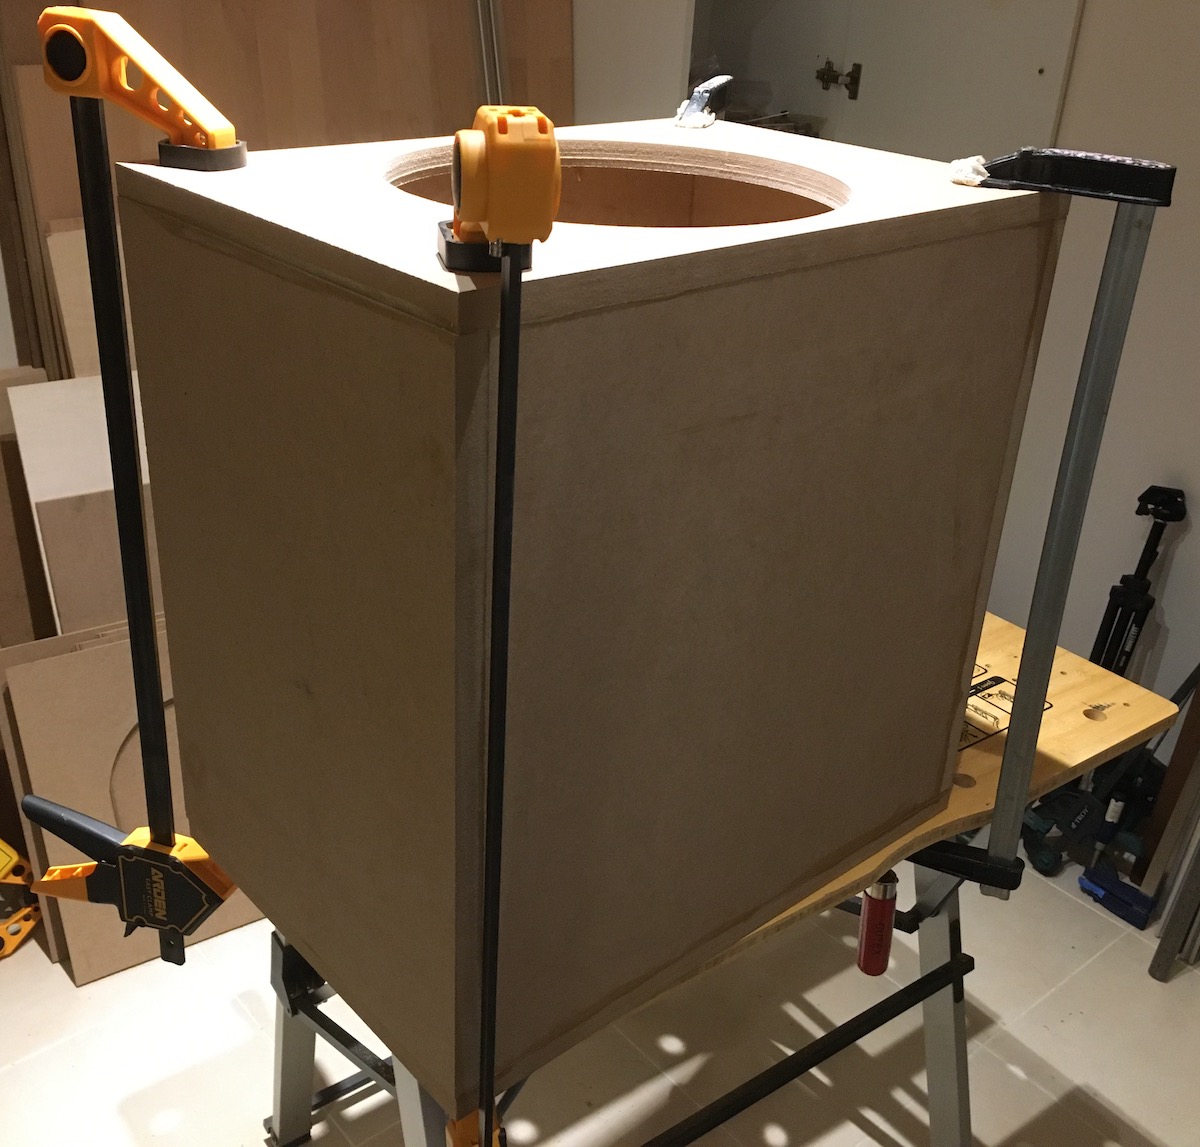 Some wood glue and a few clamps are enough to make a box.
While it’s not strictly necessary, adding some polyester fiber stuffing inside the box can make the internal volume appear slightly larger to the driver(s), allowing them to play a bit deeper. For large boxes, stuffing also helps eliminate most resonances caused by sound waves bouncing around inside the box.
Drivers can be mounted using regular wood screws (pre-drilling pilot holes is highly recommended to avoid splitting the wood). Heavy-duty drivers weighing over 10 kg (~22 pounds) may require thicker baffles (mounting surfaces) and thicker screws.
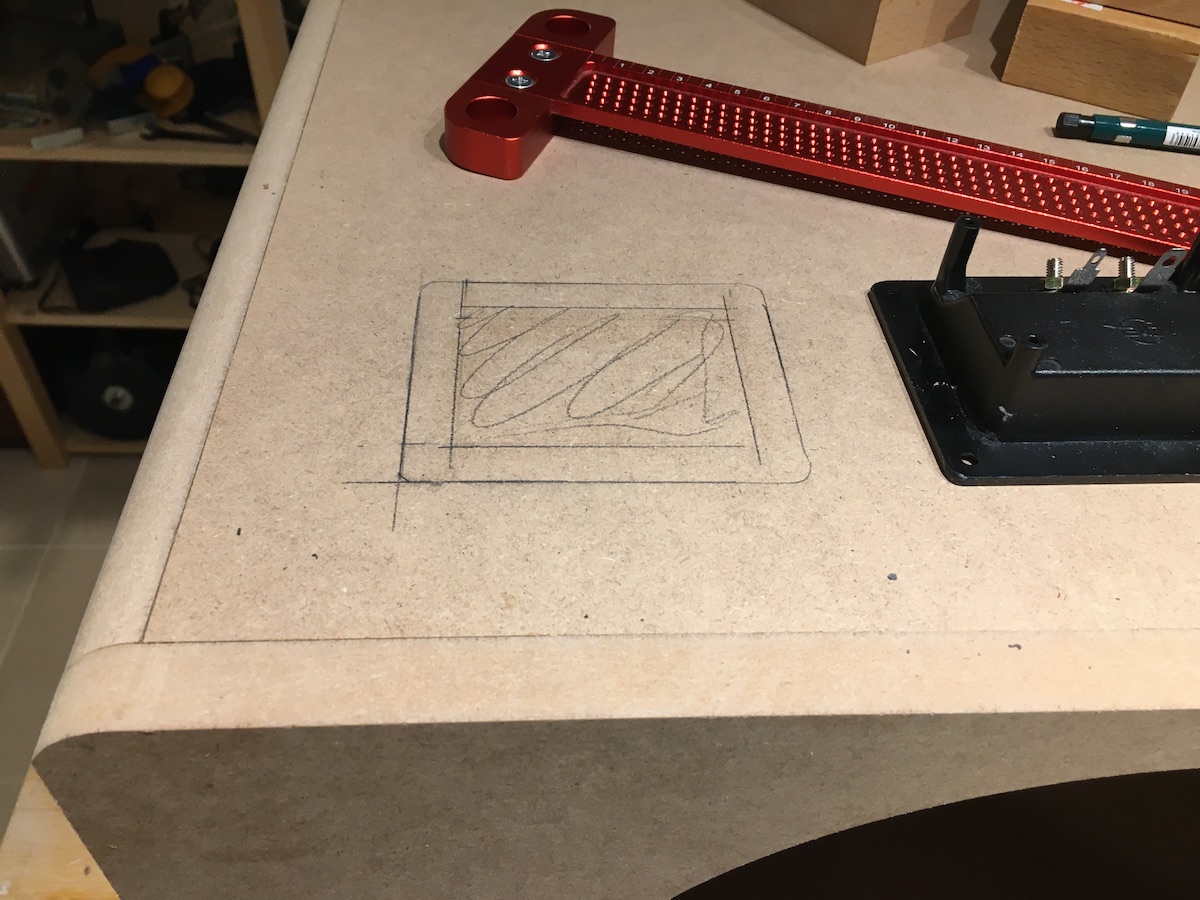 Marking the cutout for a speaker terminal cup.
Dual opposed subwoofers:
Subwoofer boxes housing a single driver tend to “walk around” when pushed hard. To fully eliminate this behavior, you can use two drivers placed on opposite sides of the box. Any movement made by one driver will be immediately canceled out by the opposing driver. You can even balance a coin on top, no matter how much the drivers are moving! Dual opposed subwoofers also have the added benefit of providing more even bass output across the room, regardless of where the drivers are facing.
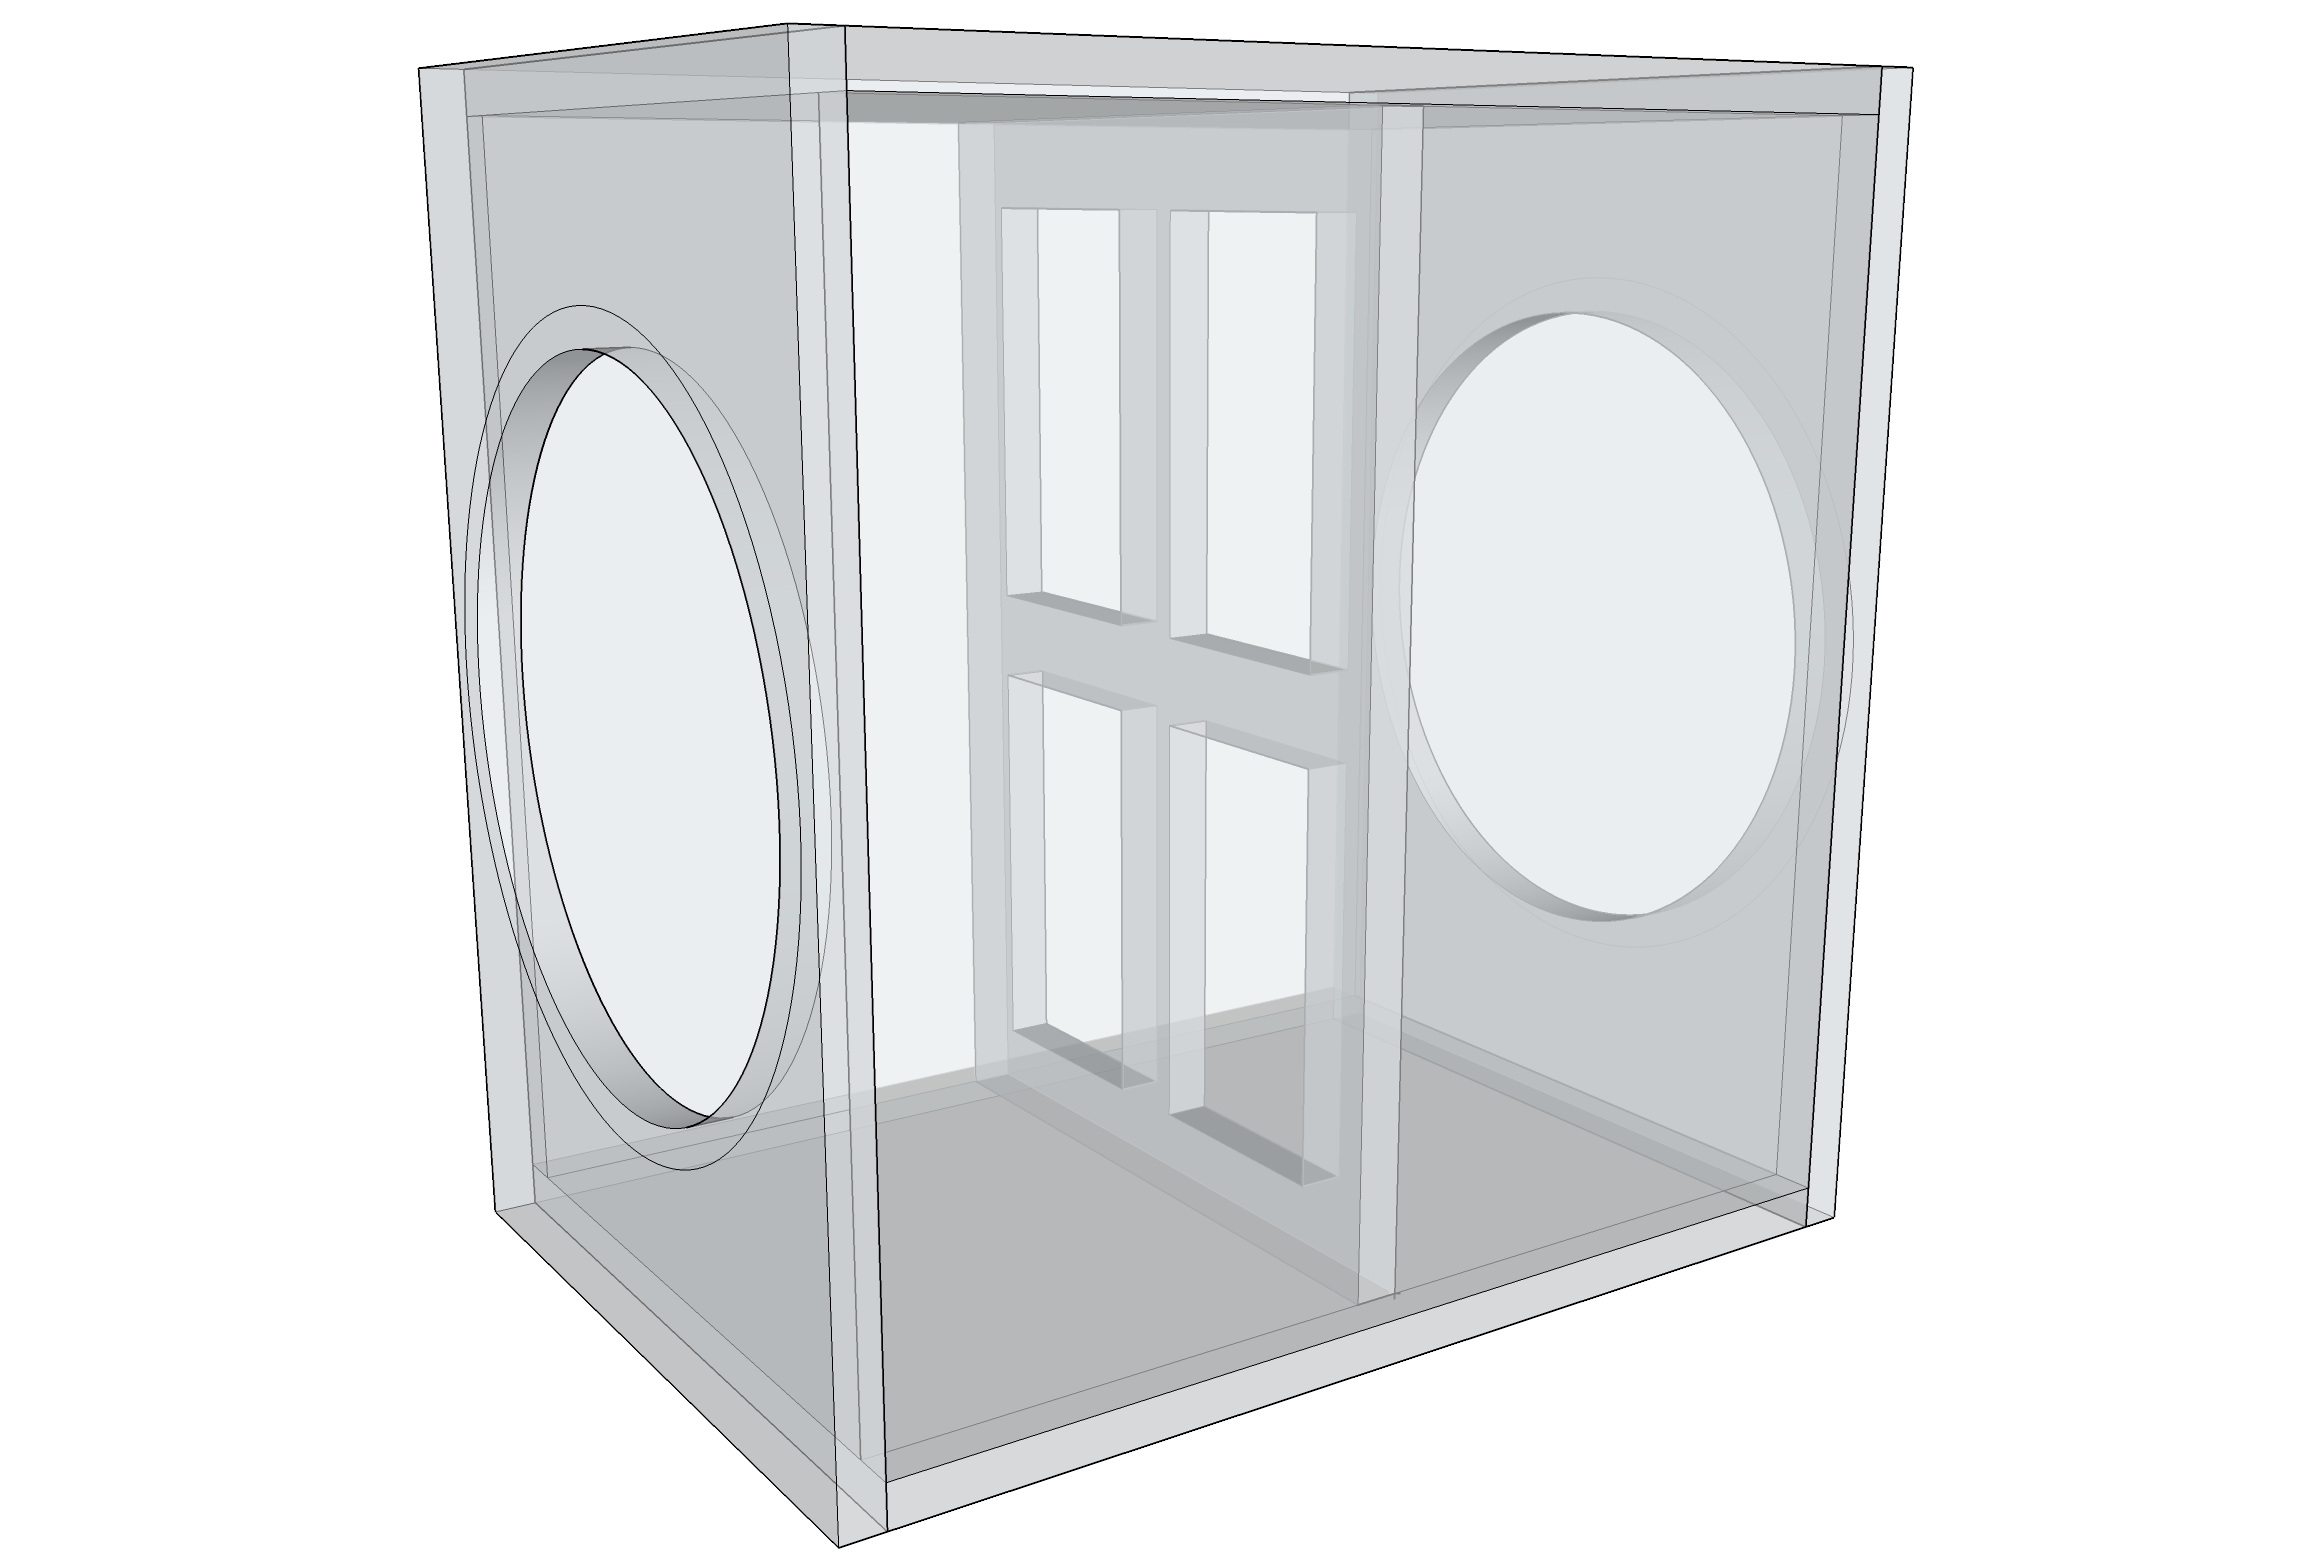 Sealed enclosure for dual opposed subwoofers with a center brace.
When using two drivers, you can connect them in series (which doubles the resistance) or in parallel (which halves the resistance). For example, two 4 ohm drivers connected in series would present an 8 ohm load to the amplifier. When connected in parallel, they would present a 2 ohm load. Subwoofer drivers often come with instructions on how to connect multiple drivers together. Having a multimeter is helpful to verify the final resistance. Just keep in mind that some amplifiers may not support low resistances, especially when they are set to bridge mode.
Making it look good:
Building a box isn’t difficult, but making it presentable may take some effort. Of course, there’s nothing stopping you from leaving the box as is, which won’t affect the performance one bit.
If you have a router, you can apply a roundover or chamfer to the edges for a nicer look. A router also comes in handy when making perfect circular cuts for the drivers. If you plan to flush mount the drivers, a router may even become a necessity.
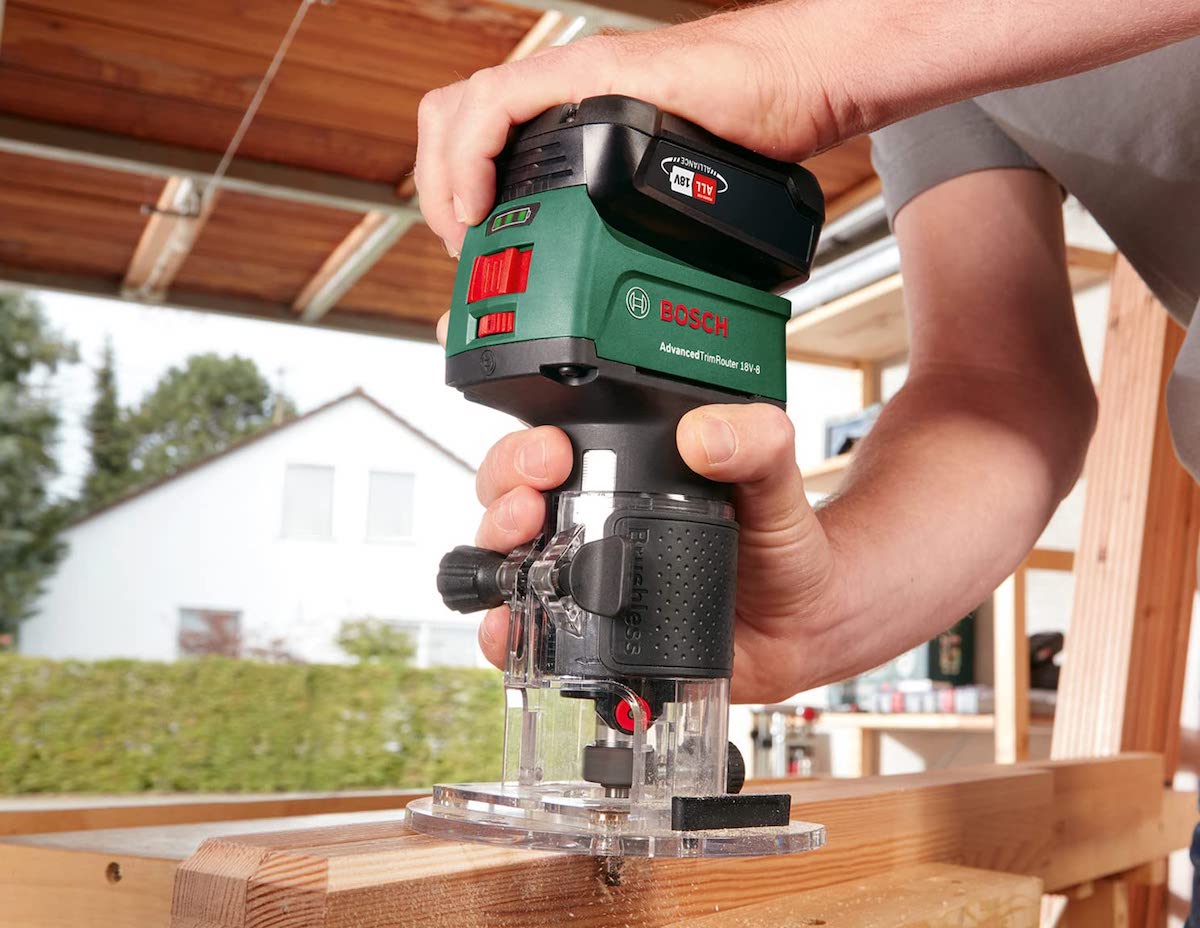 A trim router comes handy to shape edges and also to make precise circular cuts. Image © Bosch
There are basically two options for finishing: you can paint the box or apply a thin veneer made of vinyl or wood. Whichever path you choose, the surface needs to be sanded smooth first. This can be done by hand, but if you plan to build more than one box, you might want to invest in or borrow a random orbital sander, which can significantly speed up the process.
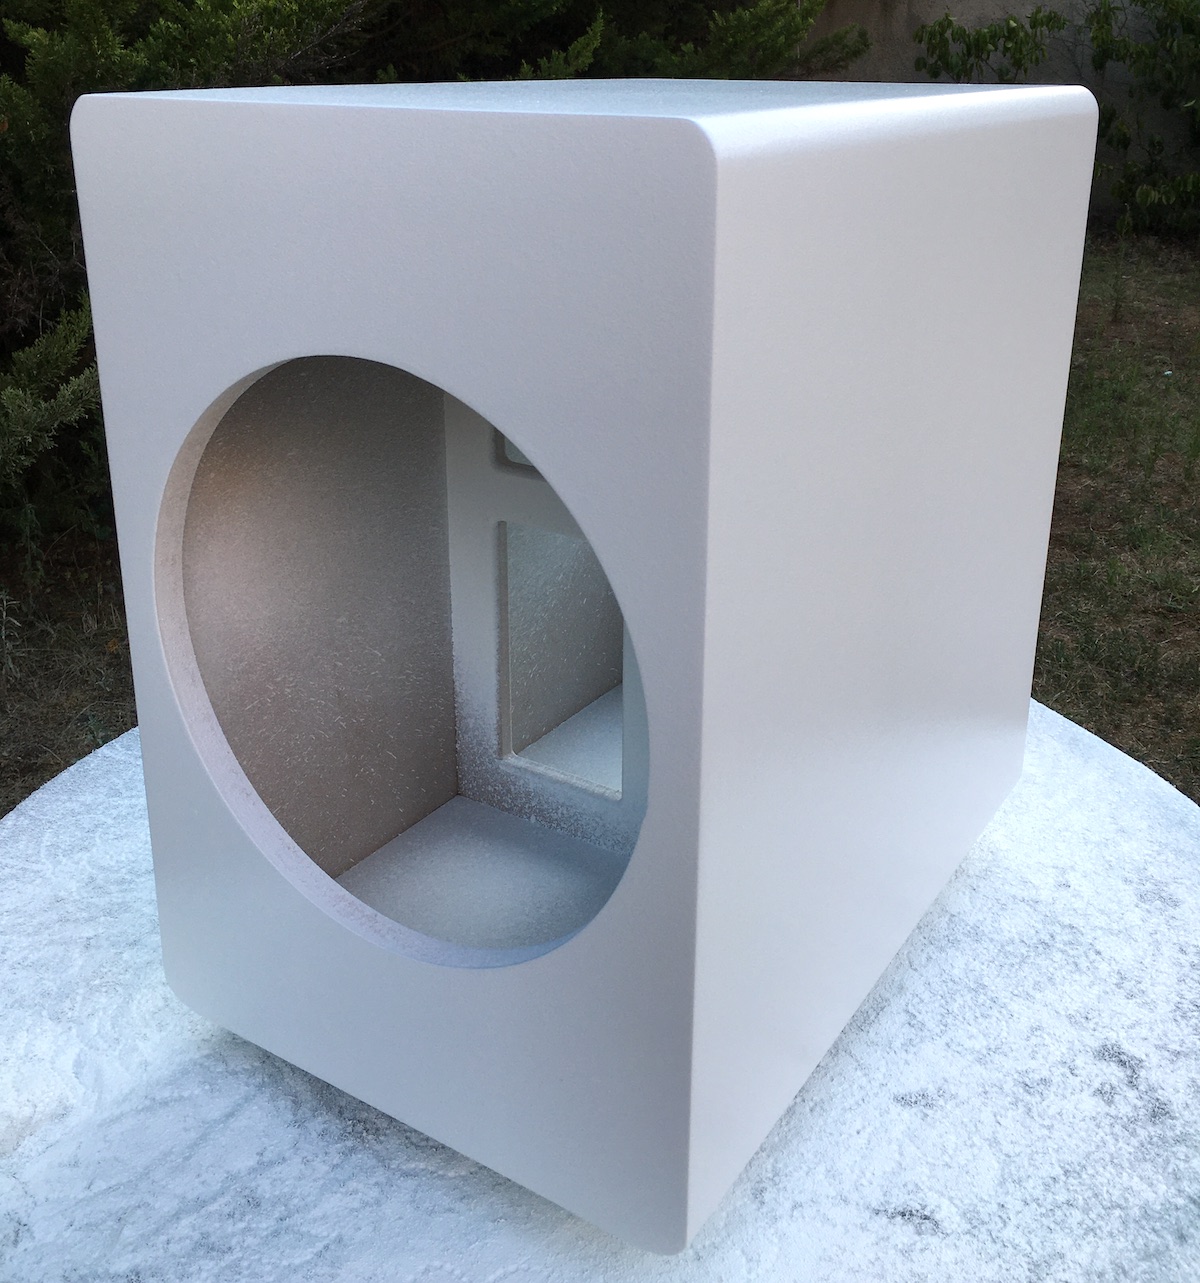 A dual opposed subwoofer box painted white with a paint gun.
If the box is made of MDF and you’ve decided to paint it, the edges must be sealed first – a mixture of half water and half wood glue can be used for this purpose. Otherwise, the edges will absorb the paint, resulting in an uneven surface finish. You can use a foam brush to apply the paint if you don’t mind some brush marks, but spraying is clearly superior. If you don’t have a paint gun, spray cans can also be used effectively. After the paint dries, it’s a good idea to apply several coats of clear coat to protect the paint, which also add a nice satin or gloss sheen.
Measuring and correcting output
The in-room frequency response of subwoofers has nothing to do with their natural outdoor response. Resonances (also called standing waves) occur inside the room, and the resonant frequencies are determined by the room dimensions. The smooth open-air response of a subwoofer is replaced by peaks and valleys (also called nulls). Peaks cause boomy bass, while nulls result in weak bass. To make matters worse, the magnitude of these peaks and nulls varies from one location to another within the room – any corrections made using the automatic room correction features of an AV receiver or through DIY parametric EQ will only be applicable to the small area where the measurements are taken.
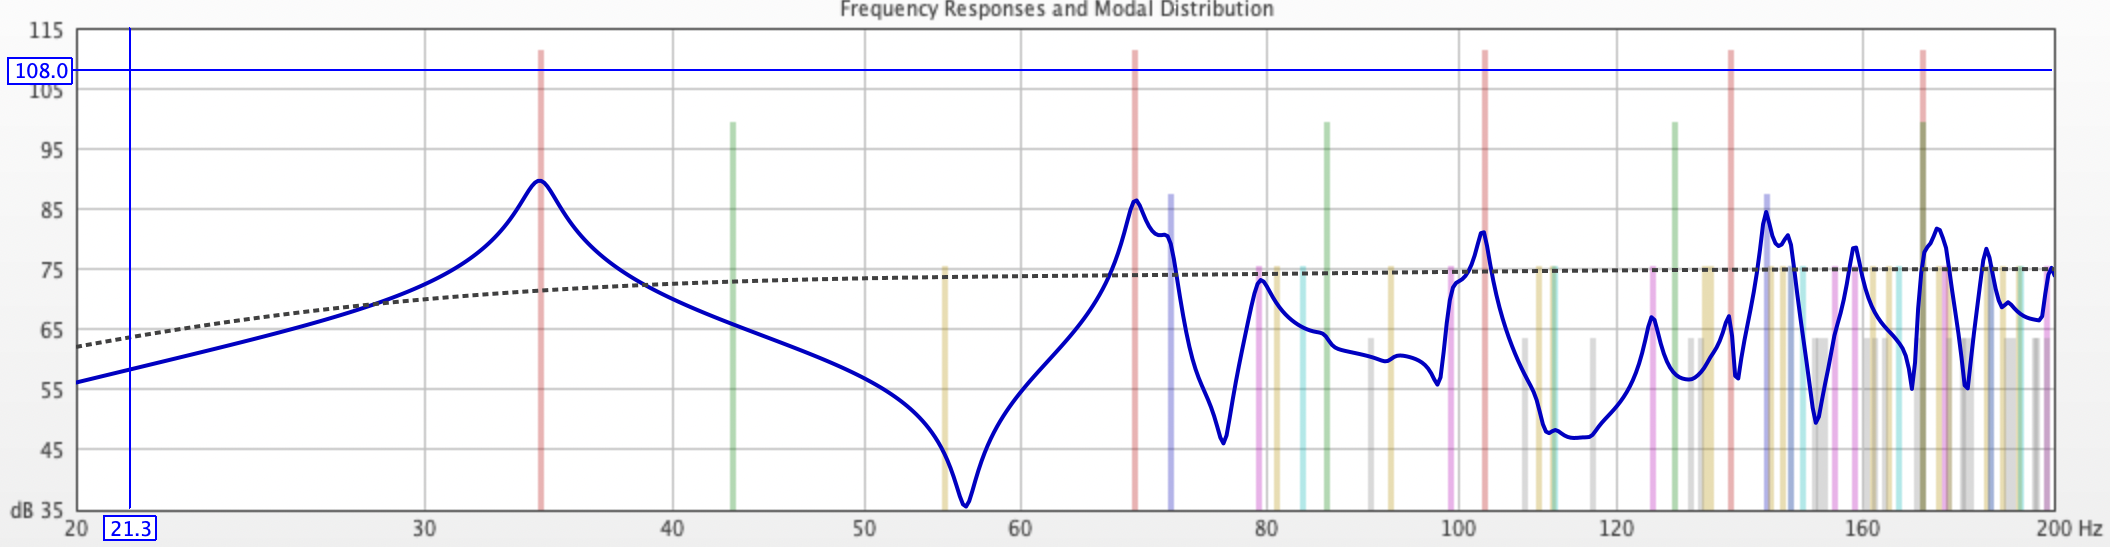 Simulated frequency response of two subwoofers in-room (solid line) vs open-air (dashed line) in listening position. The colored vertical lines correspond to this particular room's resonant frequencies.
A powerful free software application called REW (Room EQ Wizard) is a popular choice to make measurements and to automatically calculate the corrections necessary to reduce the magnitude of peaks. Nulls are better left alone because attempting to boost them can easily overload your subwoofer’s amplifier. REW also features a quite accurate Room Sim tool, which can simulate the frequency response of your subwoofers in different parts of your room without the need to physically move the subwoofers or make hundreds of measurements.
End Game: Double Bass Array
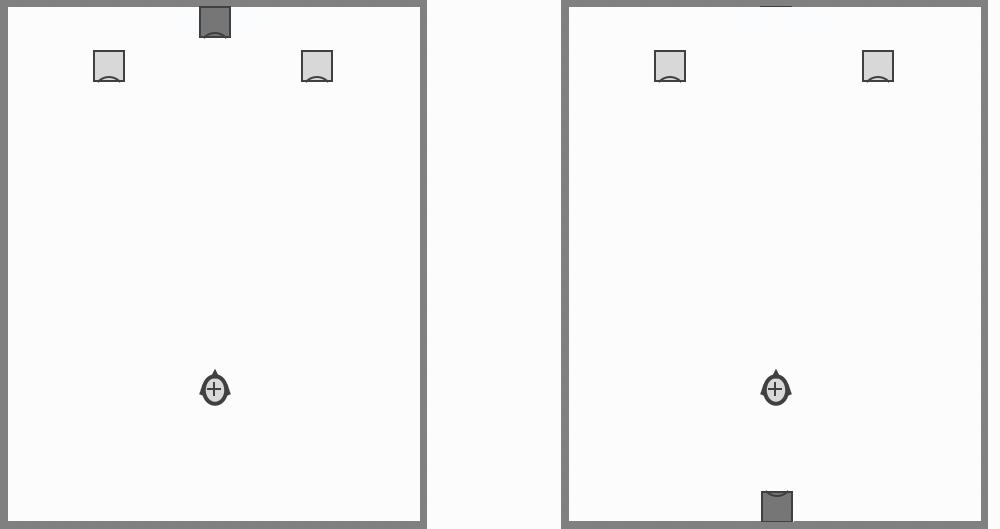
If you have a rectangular room with all parallel surfaces (no sloped ceilings) and access to at least two subwoofers, there is a special configuration known as a double bass array (DBA) that can virtually eliminate all room resonances up to a certain frequency.
For two subwoofers:
- Center a subwoofer (halfway from the side wall and floor) against the front wall and another subwoofer against the rear wall.
For four subwoofers
- Raise the front two subwoofers halfway from the floor, and position them at locations 1/4 of the front wall width from each side. Repeat this setup for the rear wall.
 Elevation view of double bass array subwoofer locations for four subwoofers (two against front wall, two against rear wall). For a 4 meter (~13 feet) wide and 2.4 meter (~8 feet) high room.
Now, you need to delay the signal going to the rear subwoofers by a certain amount, which can be calculated by simply dividing the length of the room by the speed of sound (about 0.343 meters per millisecond). For example, in a 5-meter-long room, the delay would be 5 / 0.343 = about 14.5 milliseconds. You will also need to reverse the polarity of the rear subwoofers, which can be achieved by toggling the polarity switch on powered subwoofers or by switching the positive and negative wires for passive subwoofers powered by an external amplifier.
Here’s what happens: The sound wave generated by the front subwoofers is canceled out by the rear subwoofers at the exact moment it reaches the rear wall, due to the delayed rear signal and reversed polarity. It’s as if there is no rear wall, thus eliminating resonances between the front and rear walls. The resonances between the remaining walls aren’t excited either, thanks to the strategic placement of the subwoofers.
The great thing about a DBA is that the bass output across the room will mostly be free of resonances, independent of where you sit. However, you should still avoid sitting too close to the walls.
Finally, keep in mind that delaying the signal to the rear subwoofers may require the use of an external DSP device or an amplifier with built-in signal delay features. It also helps to have the capability to make measurements to fine-tune the setup. For more information, you can refer to the DBA Wikipedia page.
Related: