KEF makes some of the best coaxial speakers in the market, and they use the same driver platform in all their speakers ranging from the entry-level Q series to all the way up to Blade. The drivers in their higher end speakers usually have stronger motors and better crossovers, but the higher prices don’t always justify the level of performance improvements.
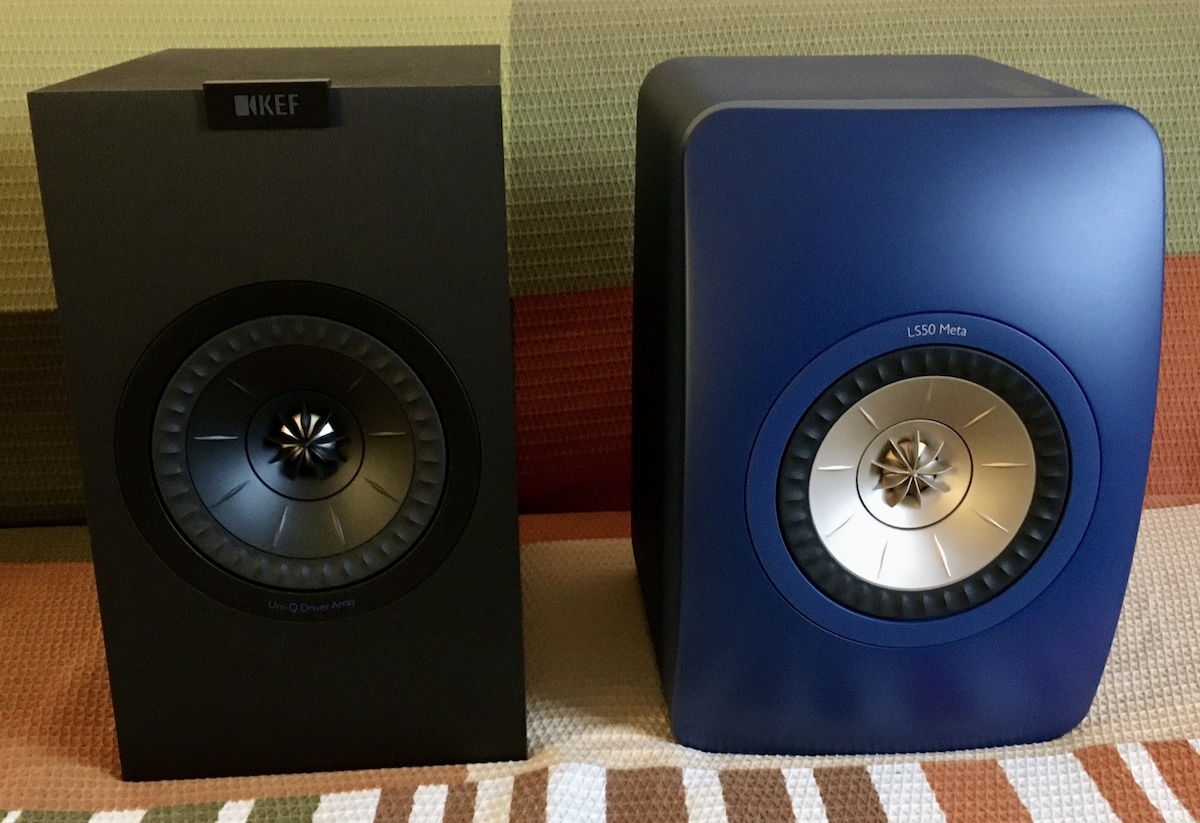 KEF Q150 and LS50 Meta side by side.
KEF’s acclaimed LS50 (and later LS50 Meta) speakers use a single coaxial driver which looks identical to the one used in the entry level Q150 from the outside, but the speakers sound quite different. If you equalize both speakers to have about the same frequency response to level the playing field, the LS50 will still have a better defined, less diffuse sound.
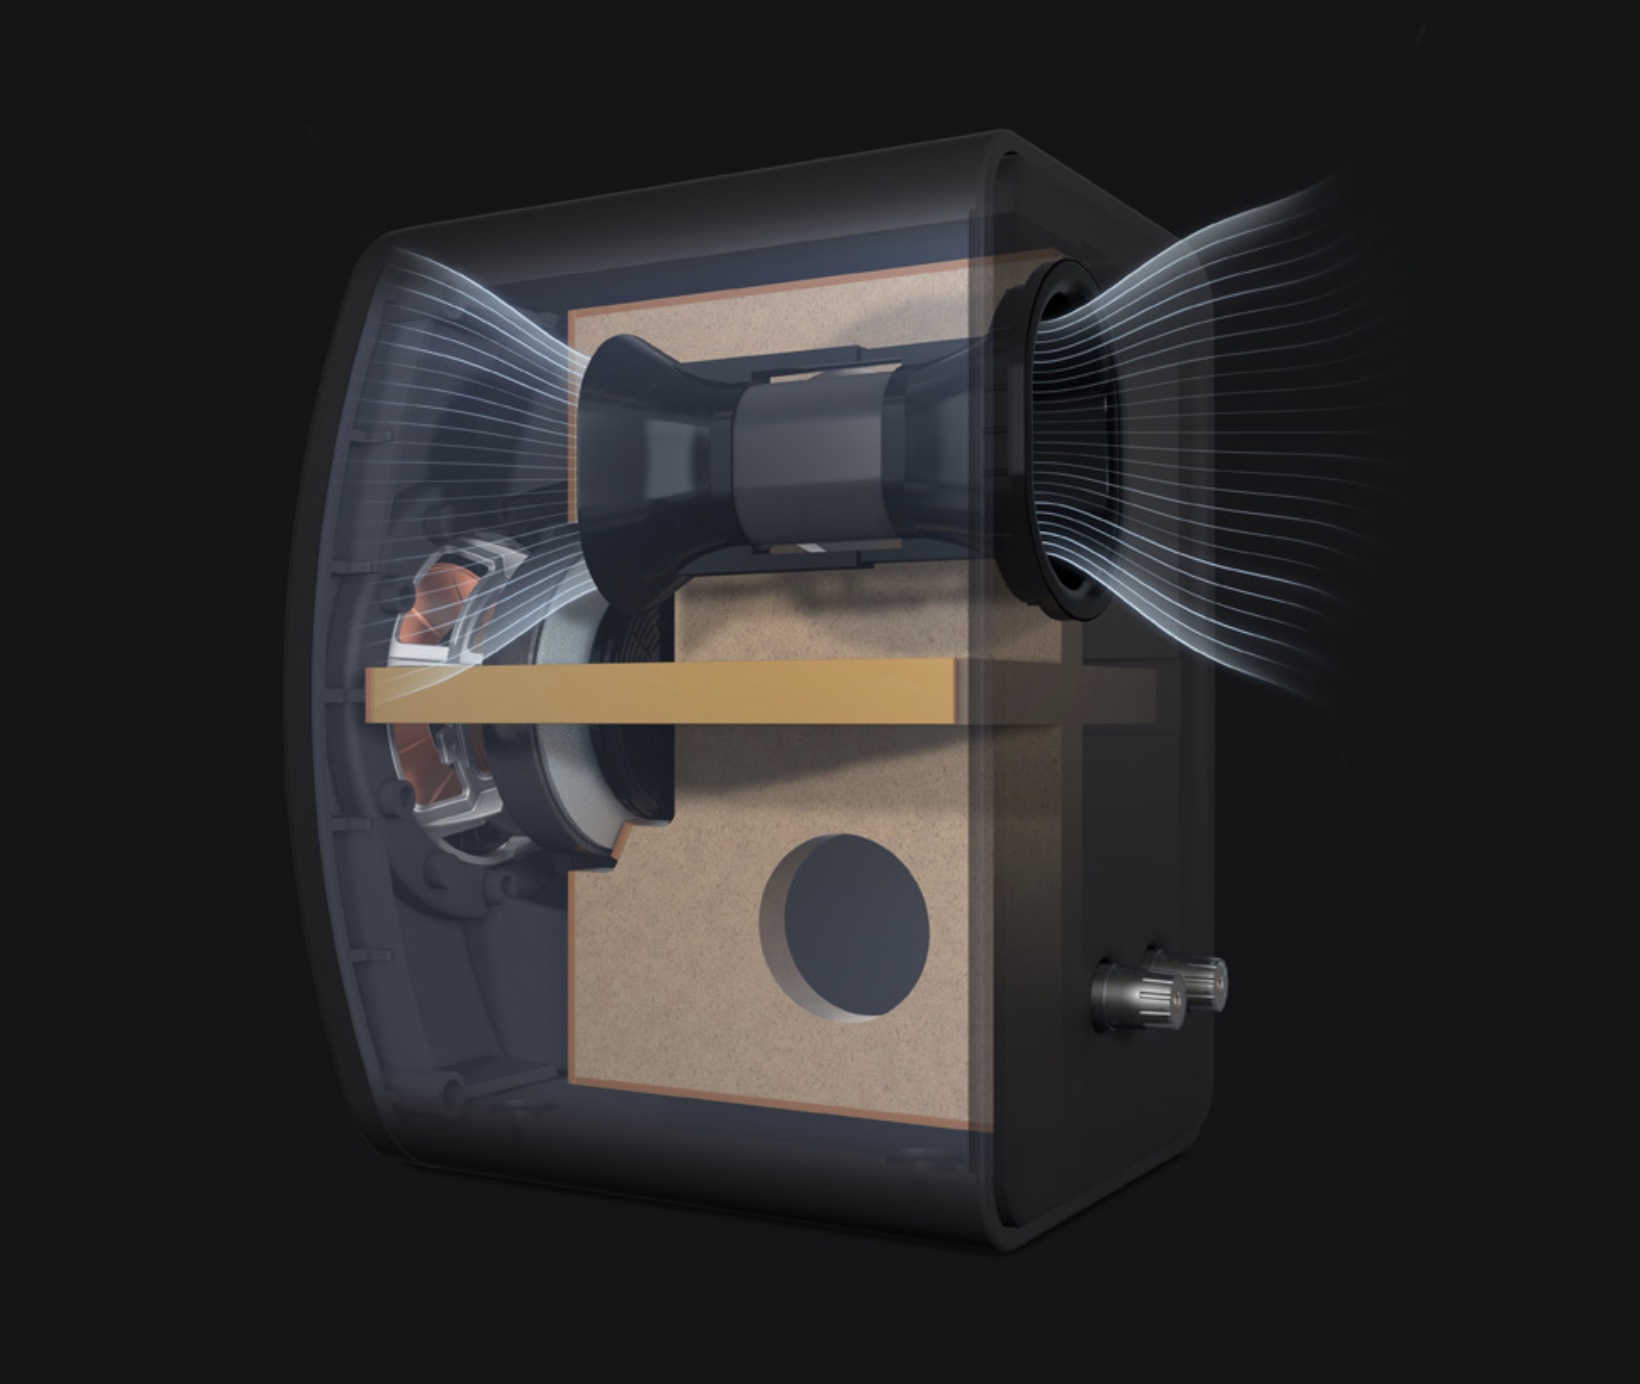 Inside KEF LS50 Meta's cabinet. Image © KEF
The LS50 has a superior cabinet that features thicker walls, substantial cross braces, a flexible port, and finally KEF’s version of Constrained Layer Damping (CLD) to minimize internal resonances. Since you can buy two to three pairs of the Q150 for the price of one pair of LS50 Meta depending on whether there’s a sale or not, I decided to build an LS50 clone using a Q150 driver to see if they would sound similar after equalization. The clone wouldn’t have the beautiful curved front baffle and better crossover of LS50 Meta, but it would otherwise be very similar in construction.
The KEF Q150 is a narrow speaker – only 18 cm (7") wide while the LS50 is slightly wider at 20 cm. My version would be even wider at 22 cm as I decided to reuse the original port, which had such a wide flare that it wouldn’t fit if the cabinet was narrower.
The KEF Q150’s front baffle is quite thick at 36 mm (1.4"), but the remaining walls are rather thin at 12.7 mm (1/2"). There’s only one small horizontal brace and very little stuffing inside, so the cabinet is naturally prone to resonances.
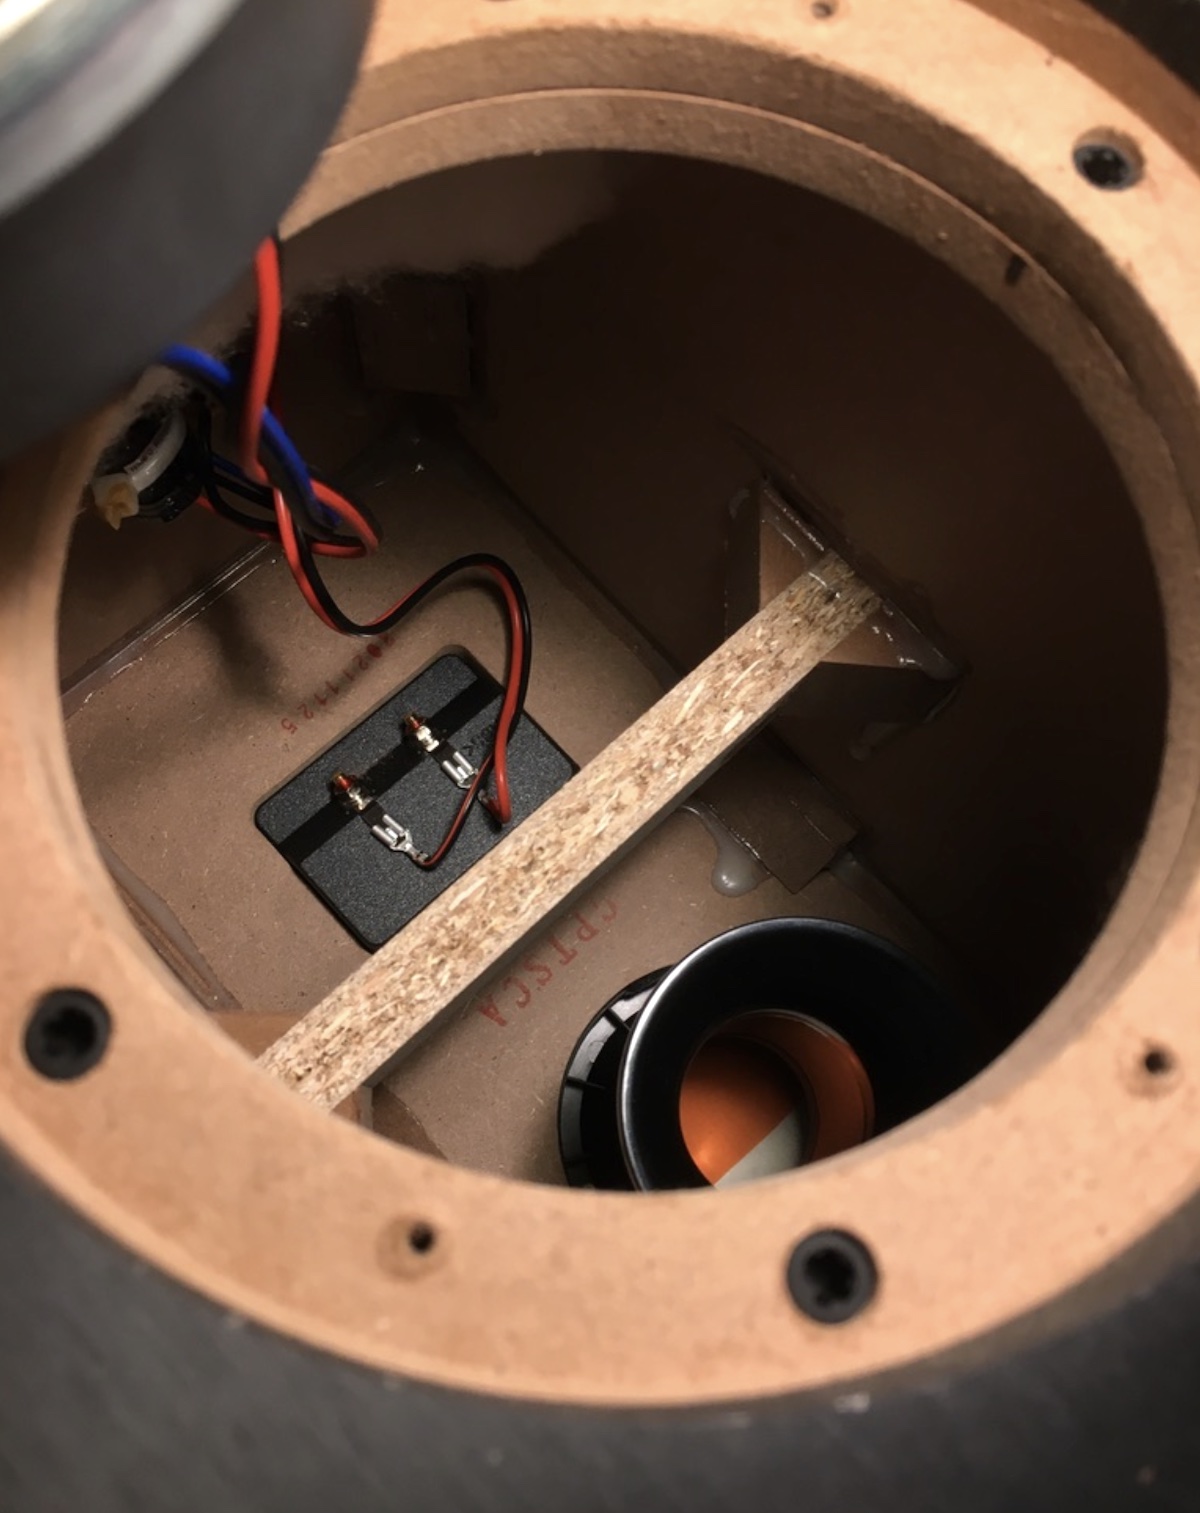 KEF Q150 has a bare-bones cabinet with one small horizontal brace.
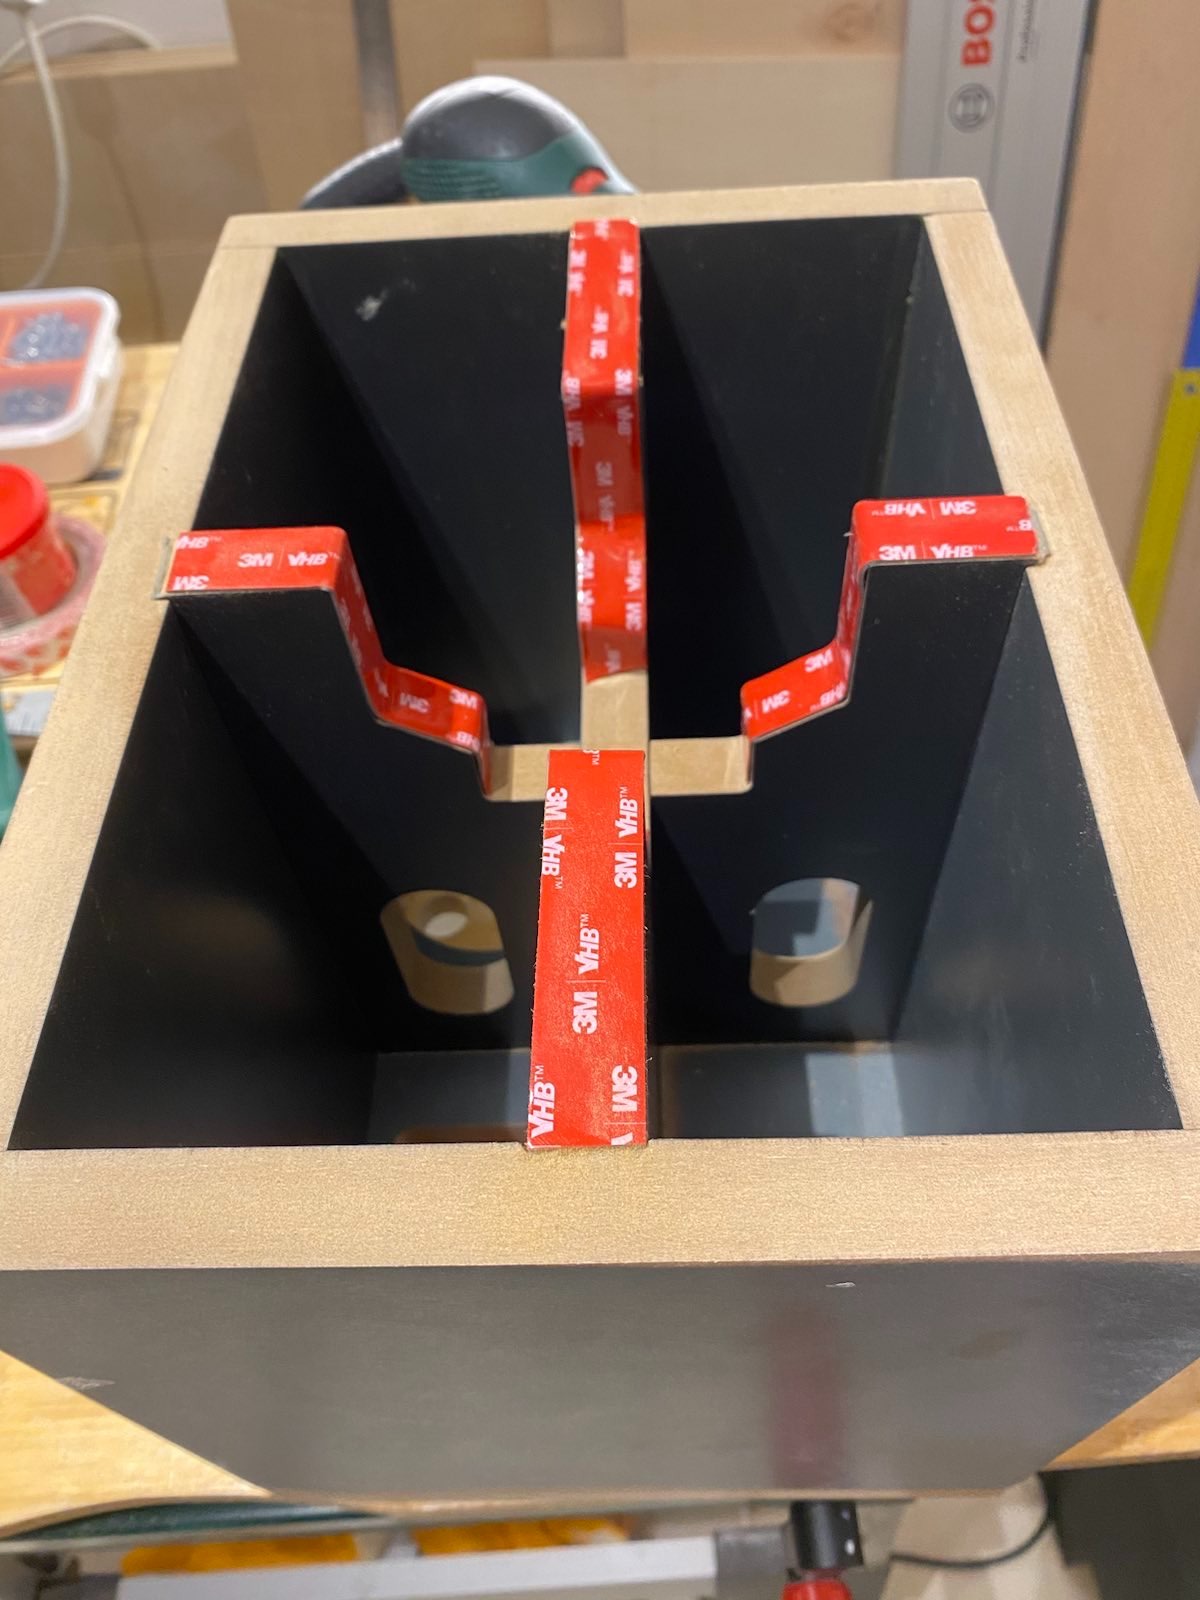
I decided to use 18 mm thick MDF just like the LS50 for all cabinet walls except for the front baffle which would stay the same at 36 mm. The cross braces would also be made out of 18 mm MDF. KEF uses something similar to 3M VHB tape to have a flexible connection between the braces and the cabinet walls as a form of CLD, so I decided to give it a try.
I started with cutting the interlocking braces and attached them to the surrounding walls by using double sided 3M VHB tape instead of wood glue. The VHB tape is supposed to act as a CLD layer to loosely couple the braces to the cabinet walls.
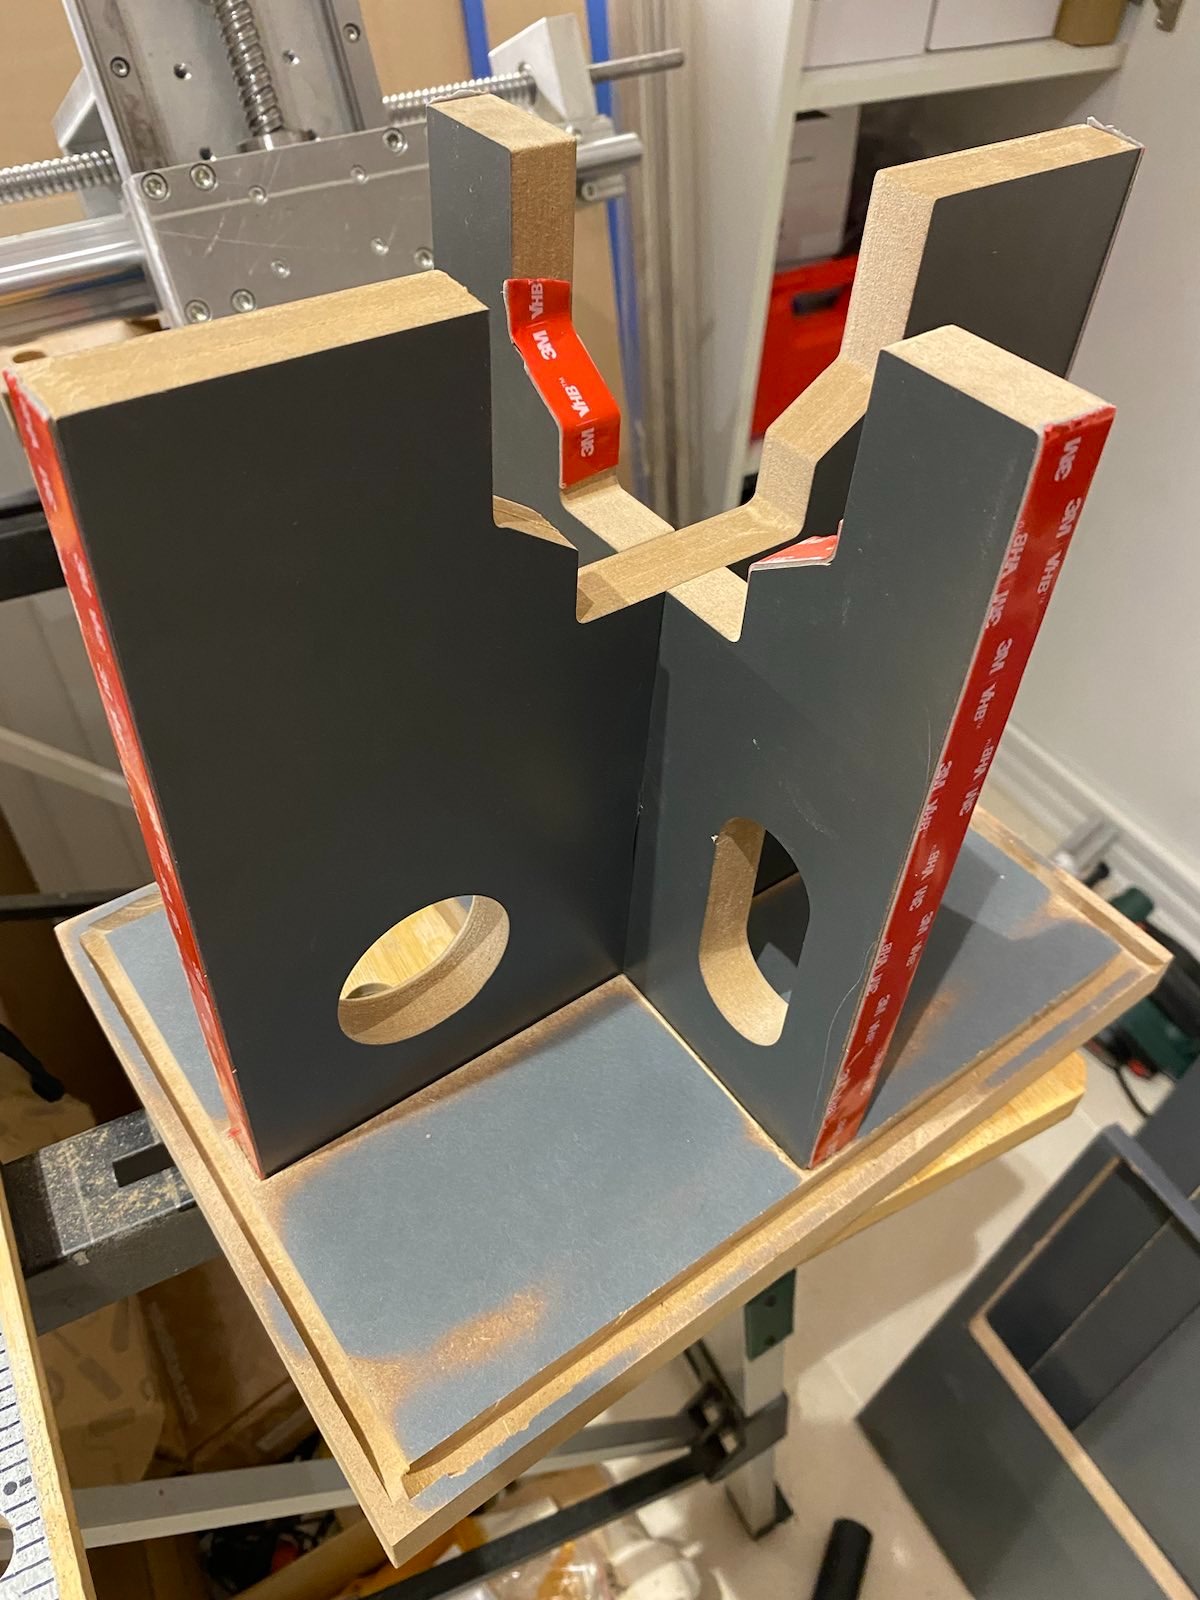 Braces support all six walls and the driver.
The outside walls are glued to each other with wood glue.
 The cabinet is coming together.
The front baffle was made out of multiple layers of MDF. I opted to use M4 threaded inserts and screws in place of the original’s wood screws, as all it takes a few driver test fits to strip wood screw holes. I also rounded over all cabinet edges except the rear side with a 12.7 mm (1/2") radius router bit, and sanded everything smooth. The cabinet weighs around 6 kg (~13 pounds).
 Front baffle was finished and cabinet edges were rounded over.
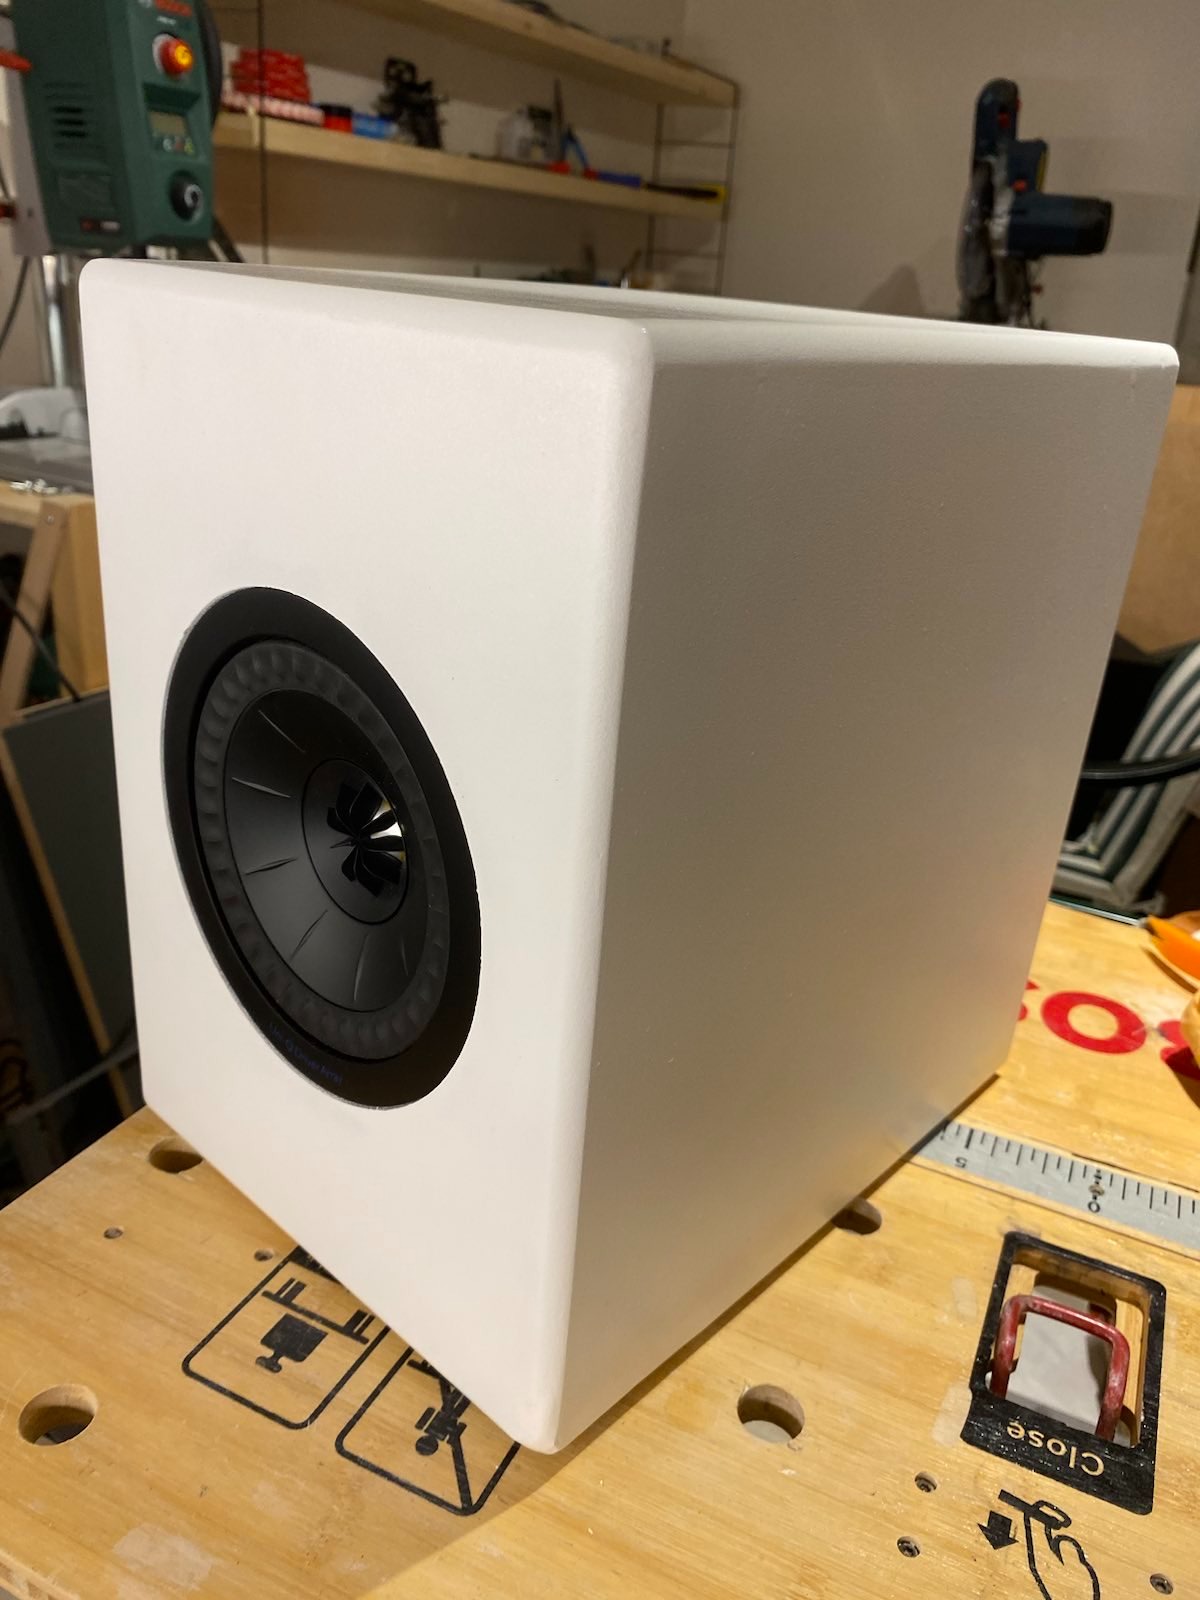
The cabinet was painted white with a spray gun with the paint I already had at hand, but I may use a different color scheme in the future.
 The cabinet painted white.
The KEF Q150 uses a simple first-order crossover board to divide the audio signal between the mid-bass driver and tweeter. Although the crossover board had clearly been designed to be mounted on the back side of the terminal cups, KEF chose not to do that for some reason. They mounted the board on the bottom side of the KEF Q150 cabinet instead. Since the original terminal cups didn’t have the necessary standoffs to mount the crossover board, I purchased another set with standoffs, and used M3 nylon screws to mount the board after tapping the standoffs of course.
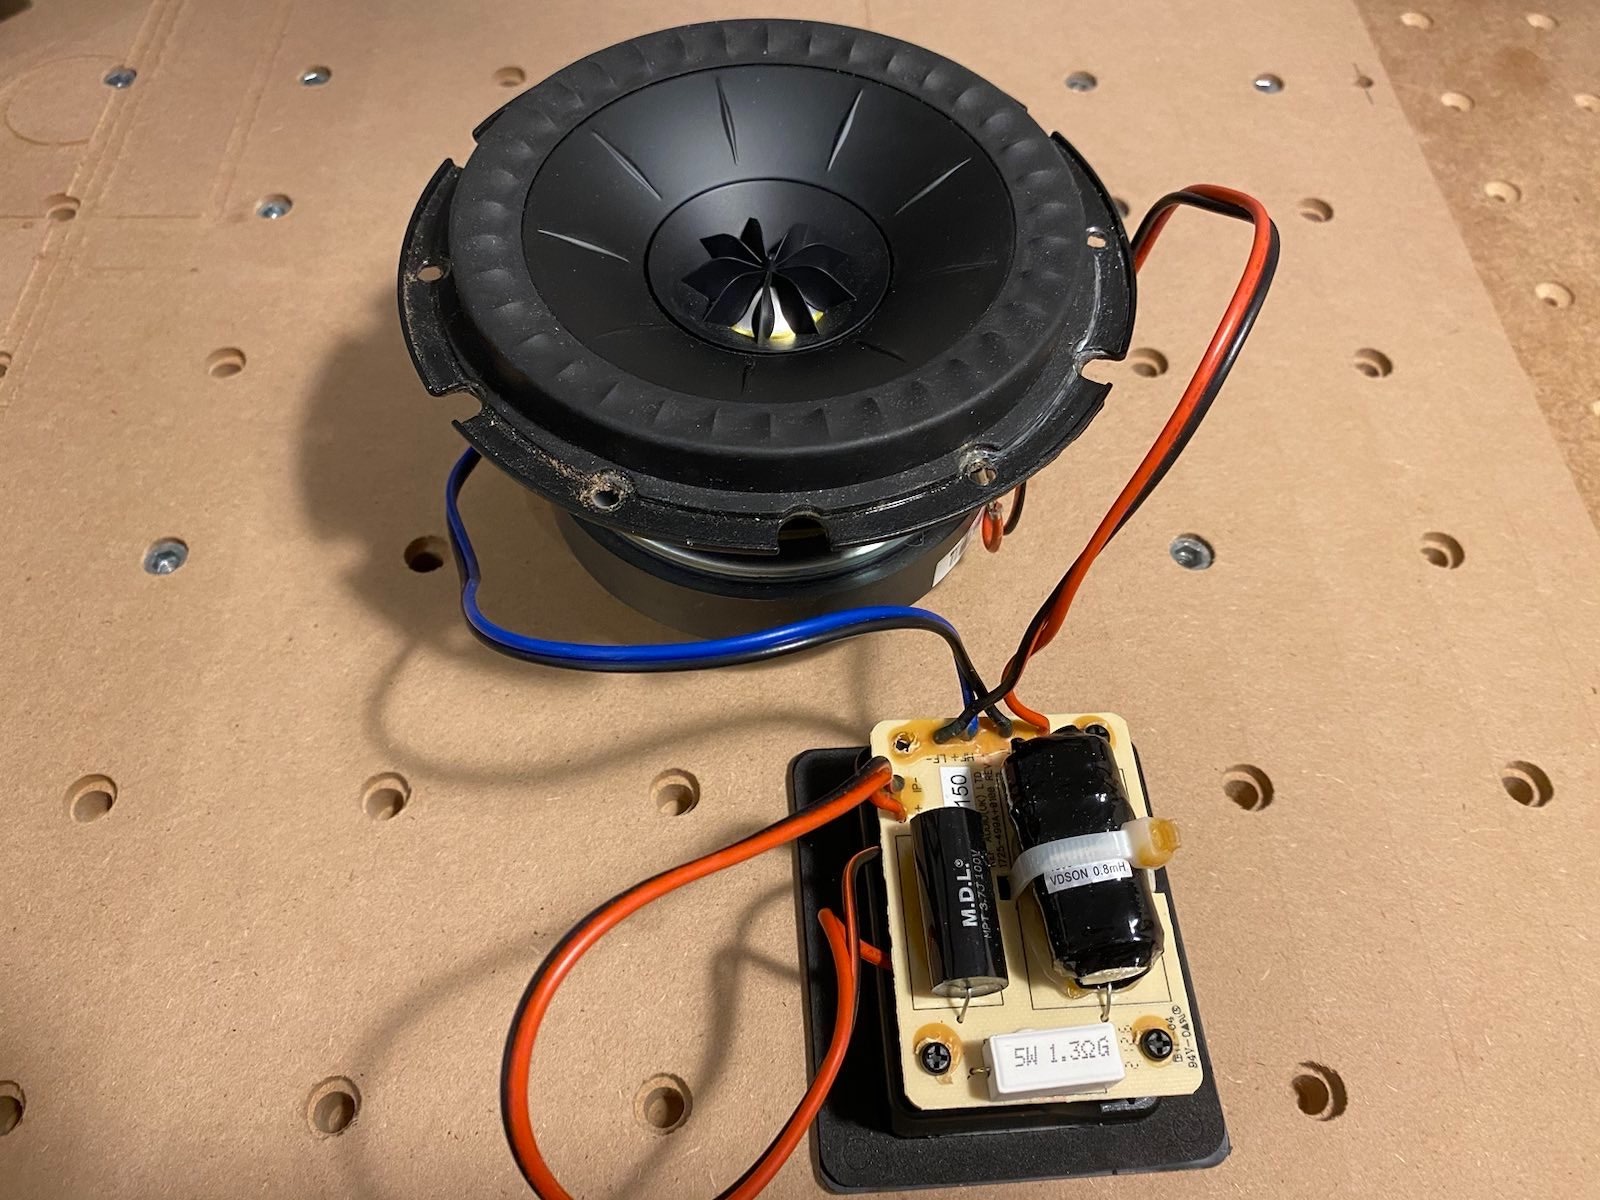 The KEF Q150 crossover is mounted to the terminal cups in my version.
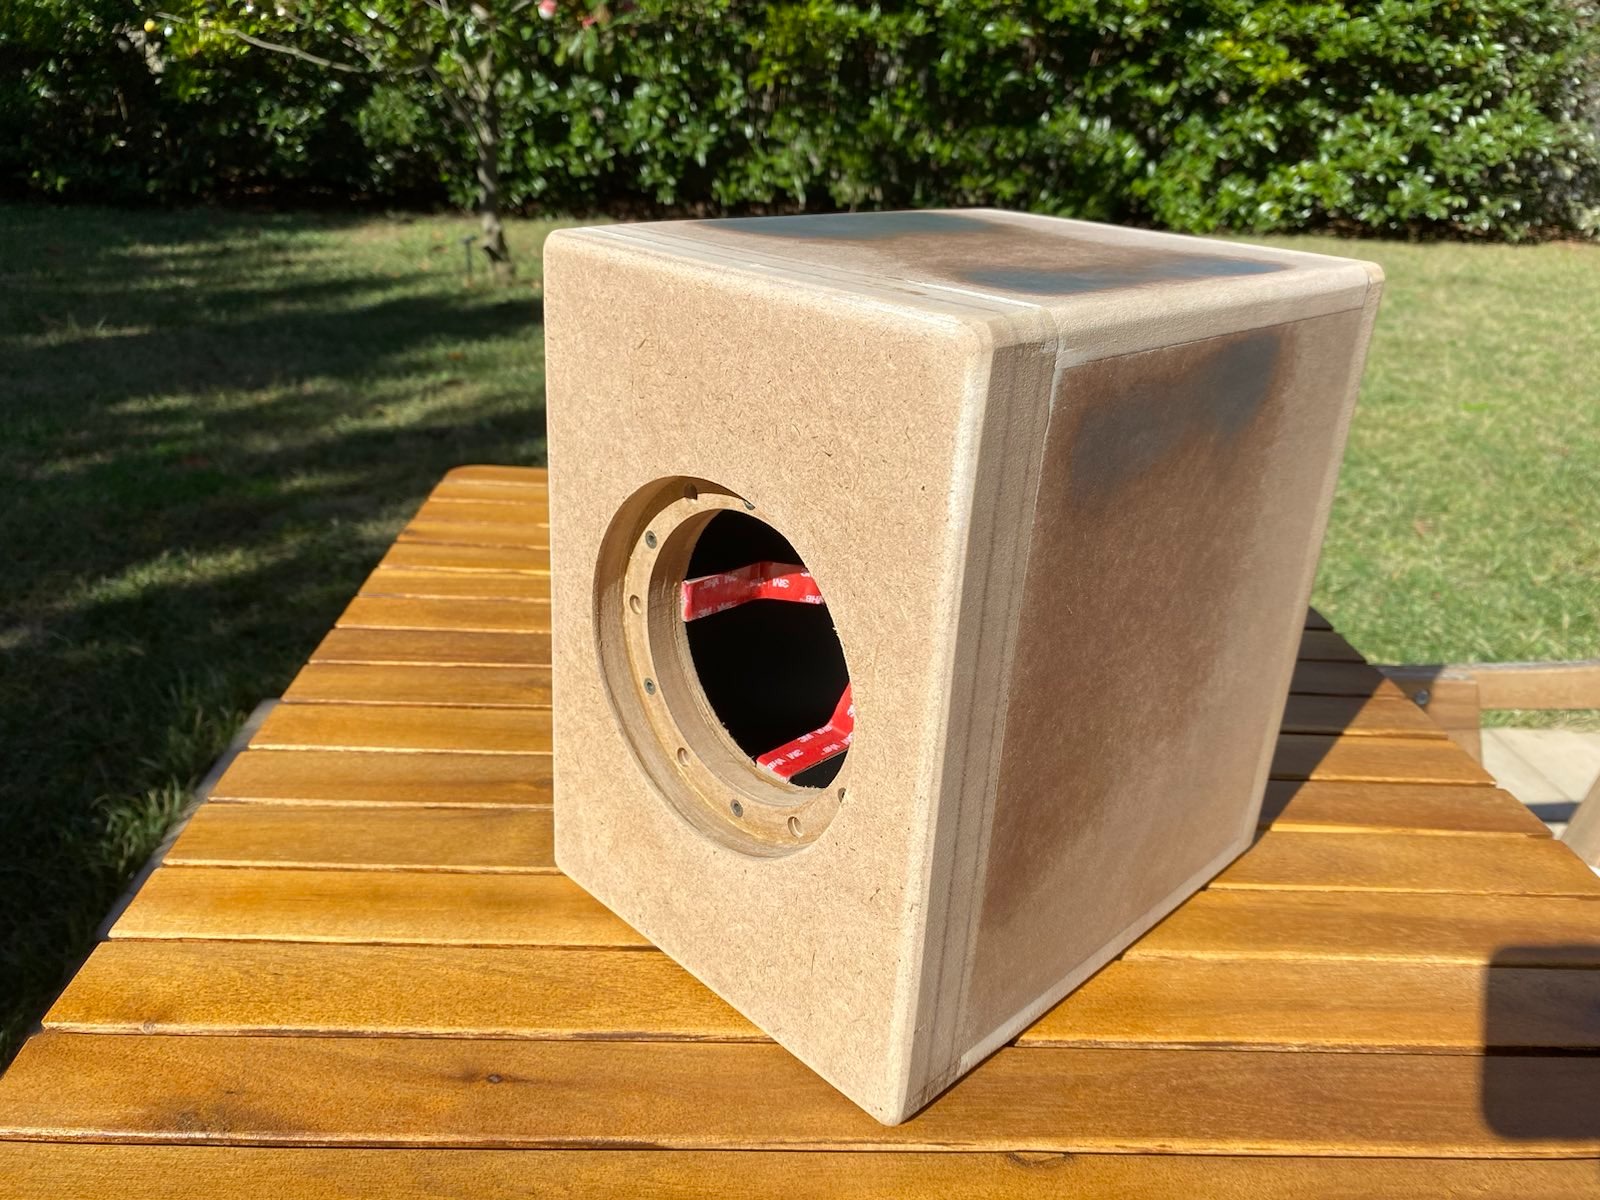
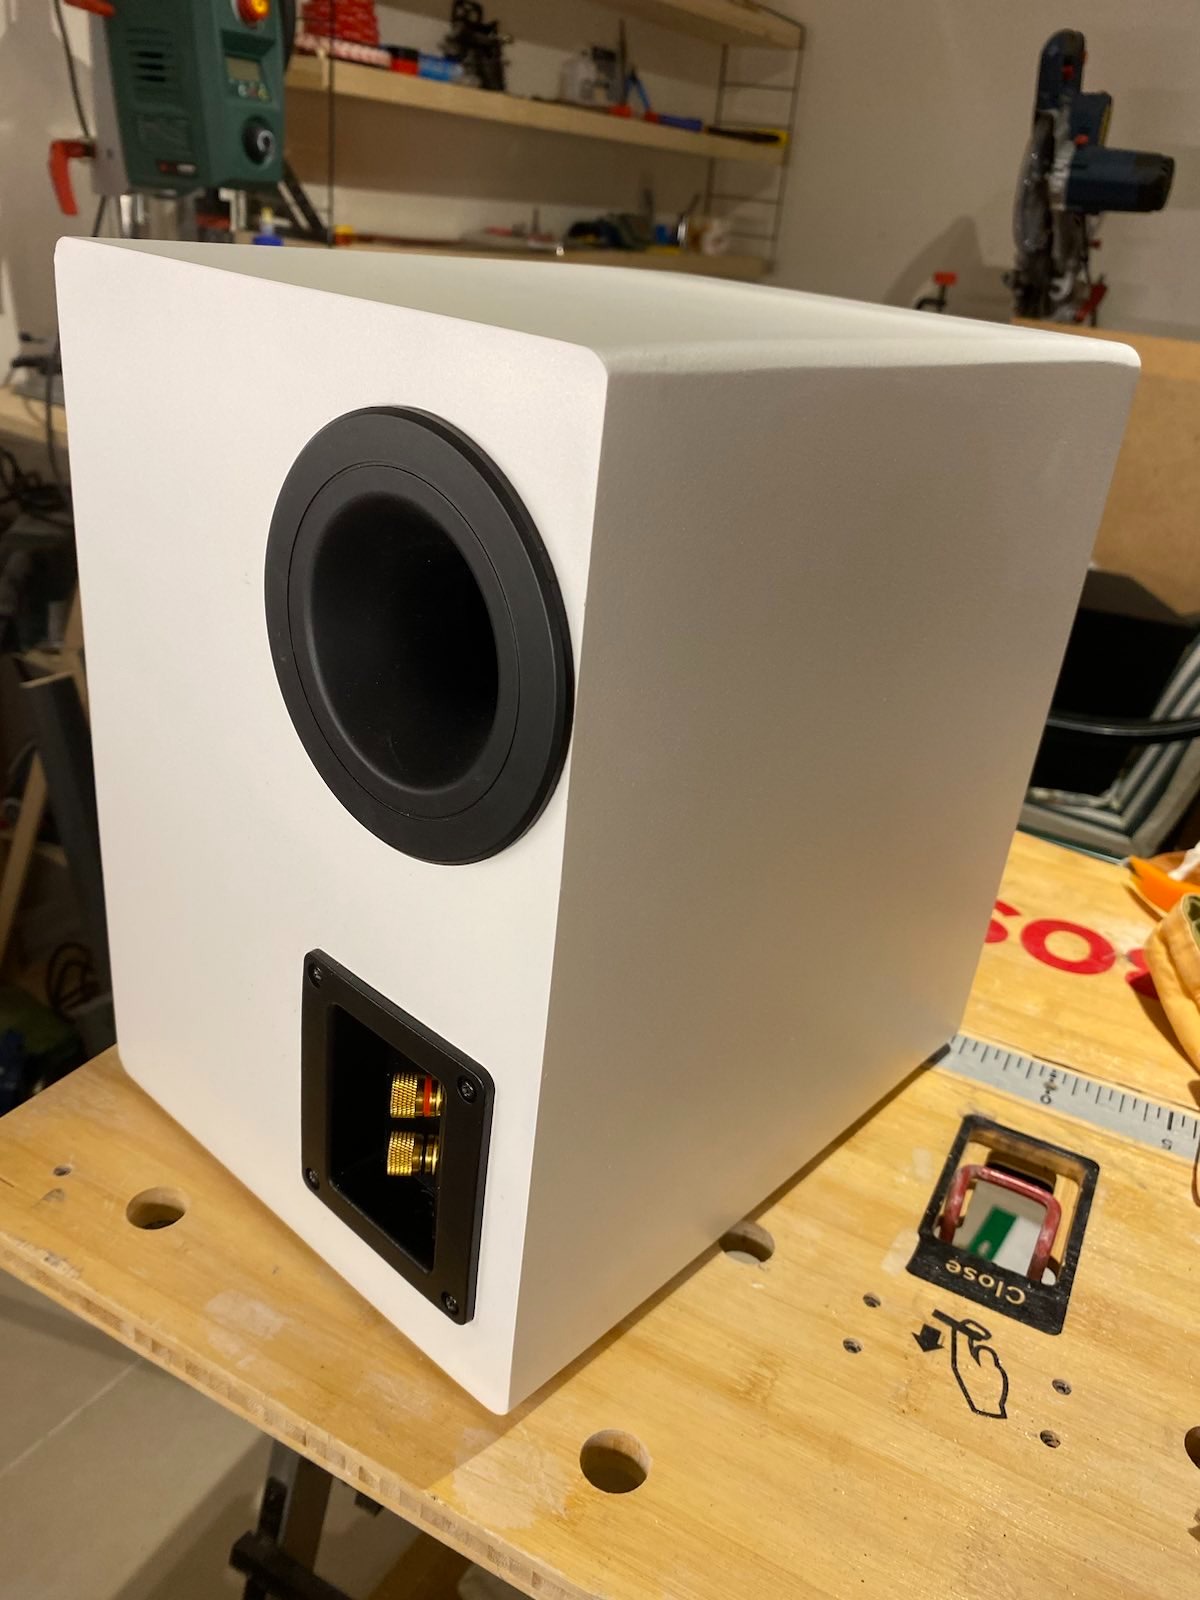
Here is the finished cabinet with the driver and trim ring mounted. I reused the rubber grommets from the original to mount the trim ring. I was excited to test the speaker out, so there is no clear coat to protect the paint on the speaker yet.
 In my version, the crossover board is mounted on the backside of the terminal cups.
The center of the port is positioned one-fourth of the way from the right and the top to cancel some of the internal standing waves. The terminal cups are also mounted vertically. I think they look better that way.
 Finished cabinet - rear.
So, how does it sound? Quite good actually. The original had a great sound stage thanks to the well designed coaxial driver, but was undermined by the cabinet. With the new cabinet, I’m getting better bass definition, and the upper notes have better clarity.
After listening to the speaker, I made impedance measurements of the original KEF Q150 and my LS50 clone. My measurement setup isn’t super accurate, but the wiggles that indicate the resonances in the original (orange) are mostly gone in my LS50 clone (green). The difference is especially visible at around 700 Hz.
 Impedance measurement (Orange: KEF Q150, Green: LS50 Clone)
Update (August 2, 2025):
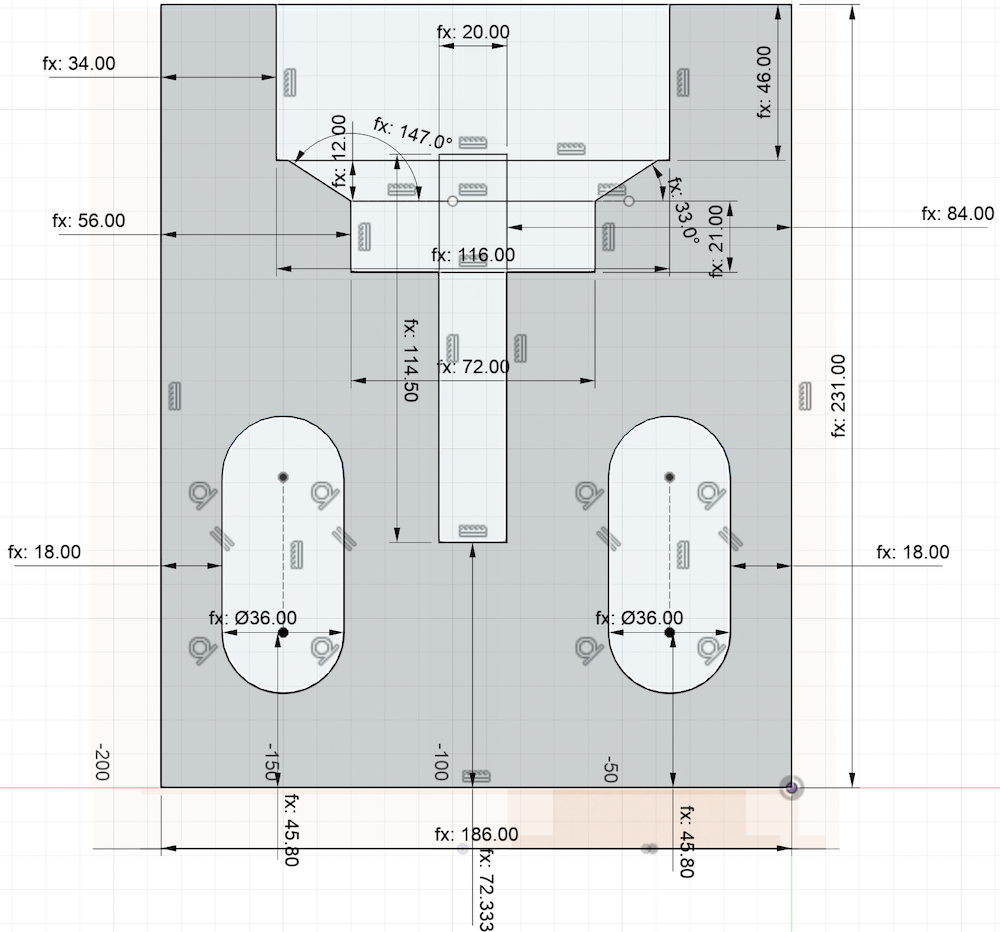
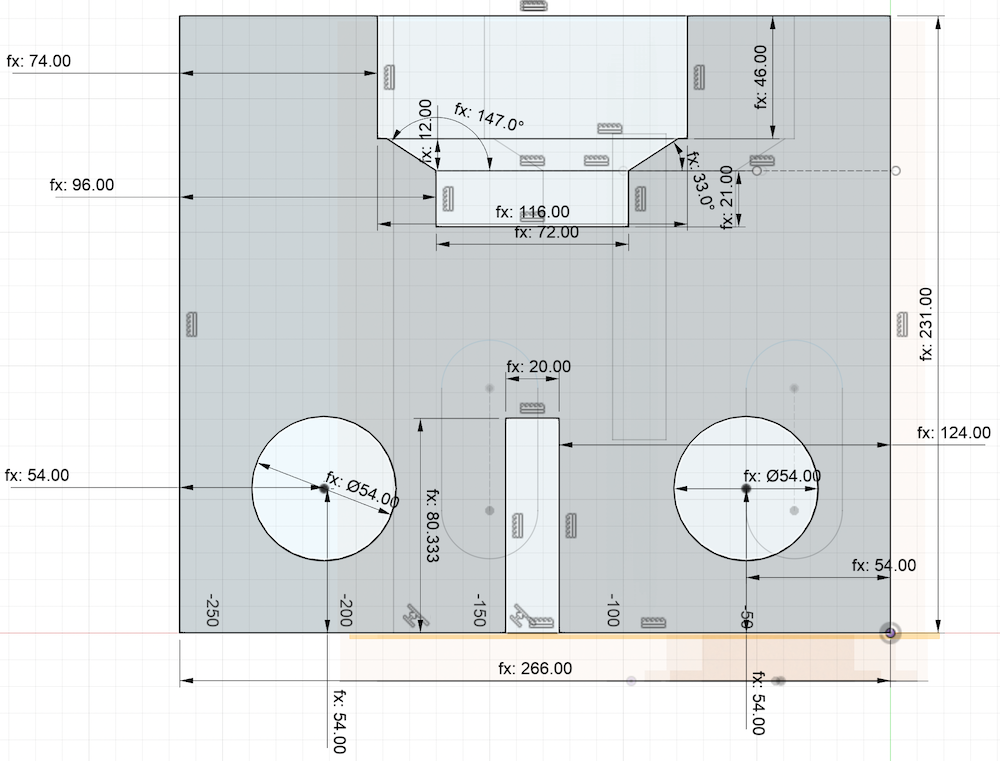
Plans for the horizontal and vertical braces are available below (units are in mm):
 Plan for horizontal brace.
 Plan for vertical brace.
Worth a read:
Related: